How to Replace Pivot Bearings on a Specialized Epic 8
Published: 2/21/2026
Tags: Epic 8, Epic 8 EVO, pivot bearings, suspension service, maintenance
TL;DR — Epic 8 Pivot Bearings
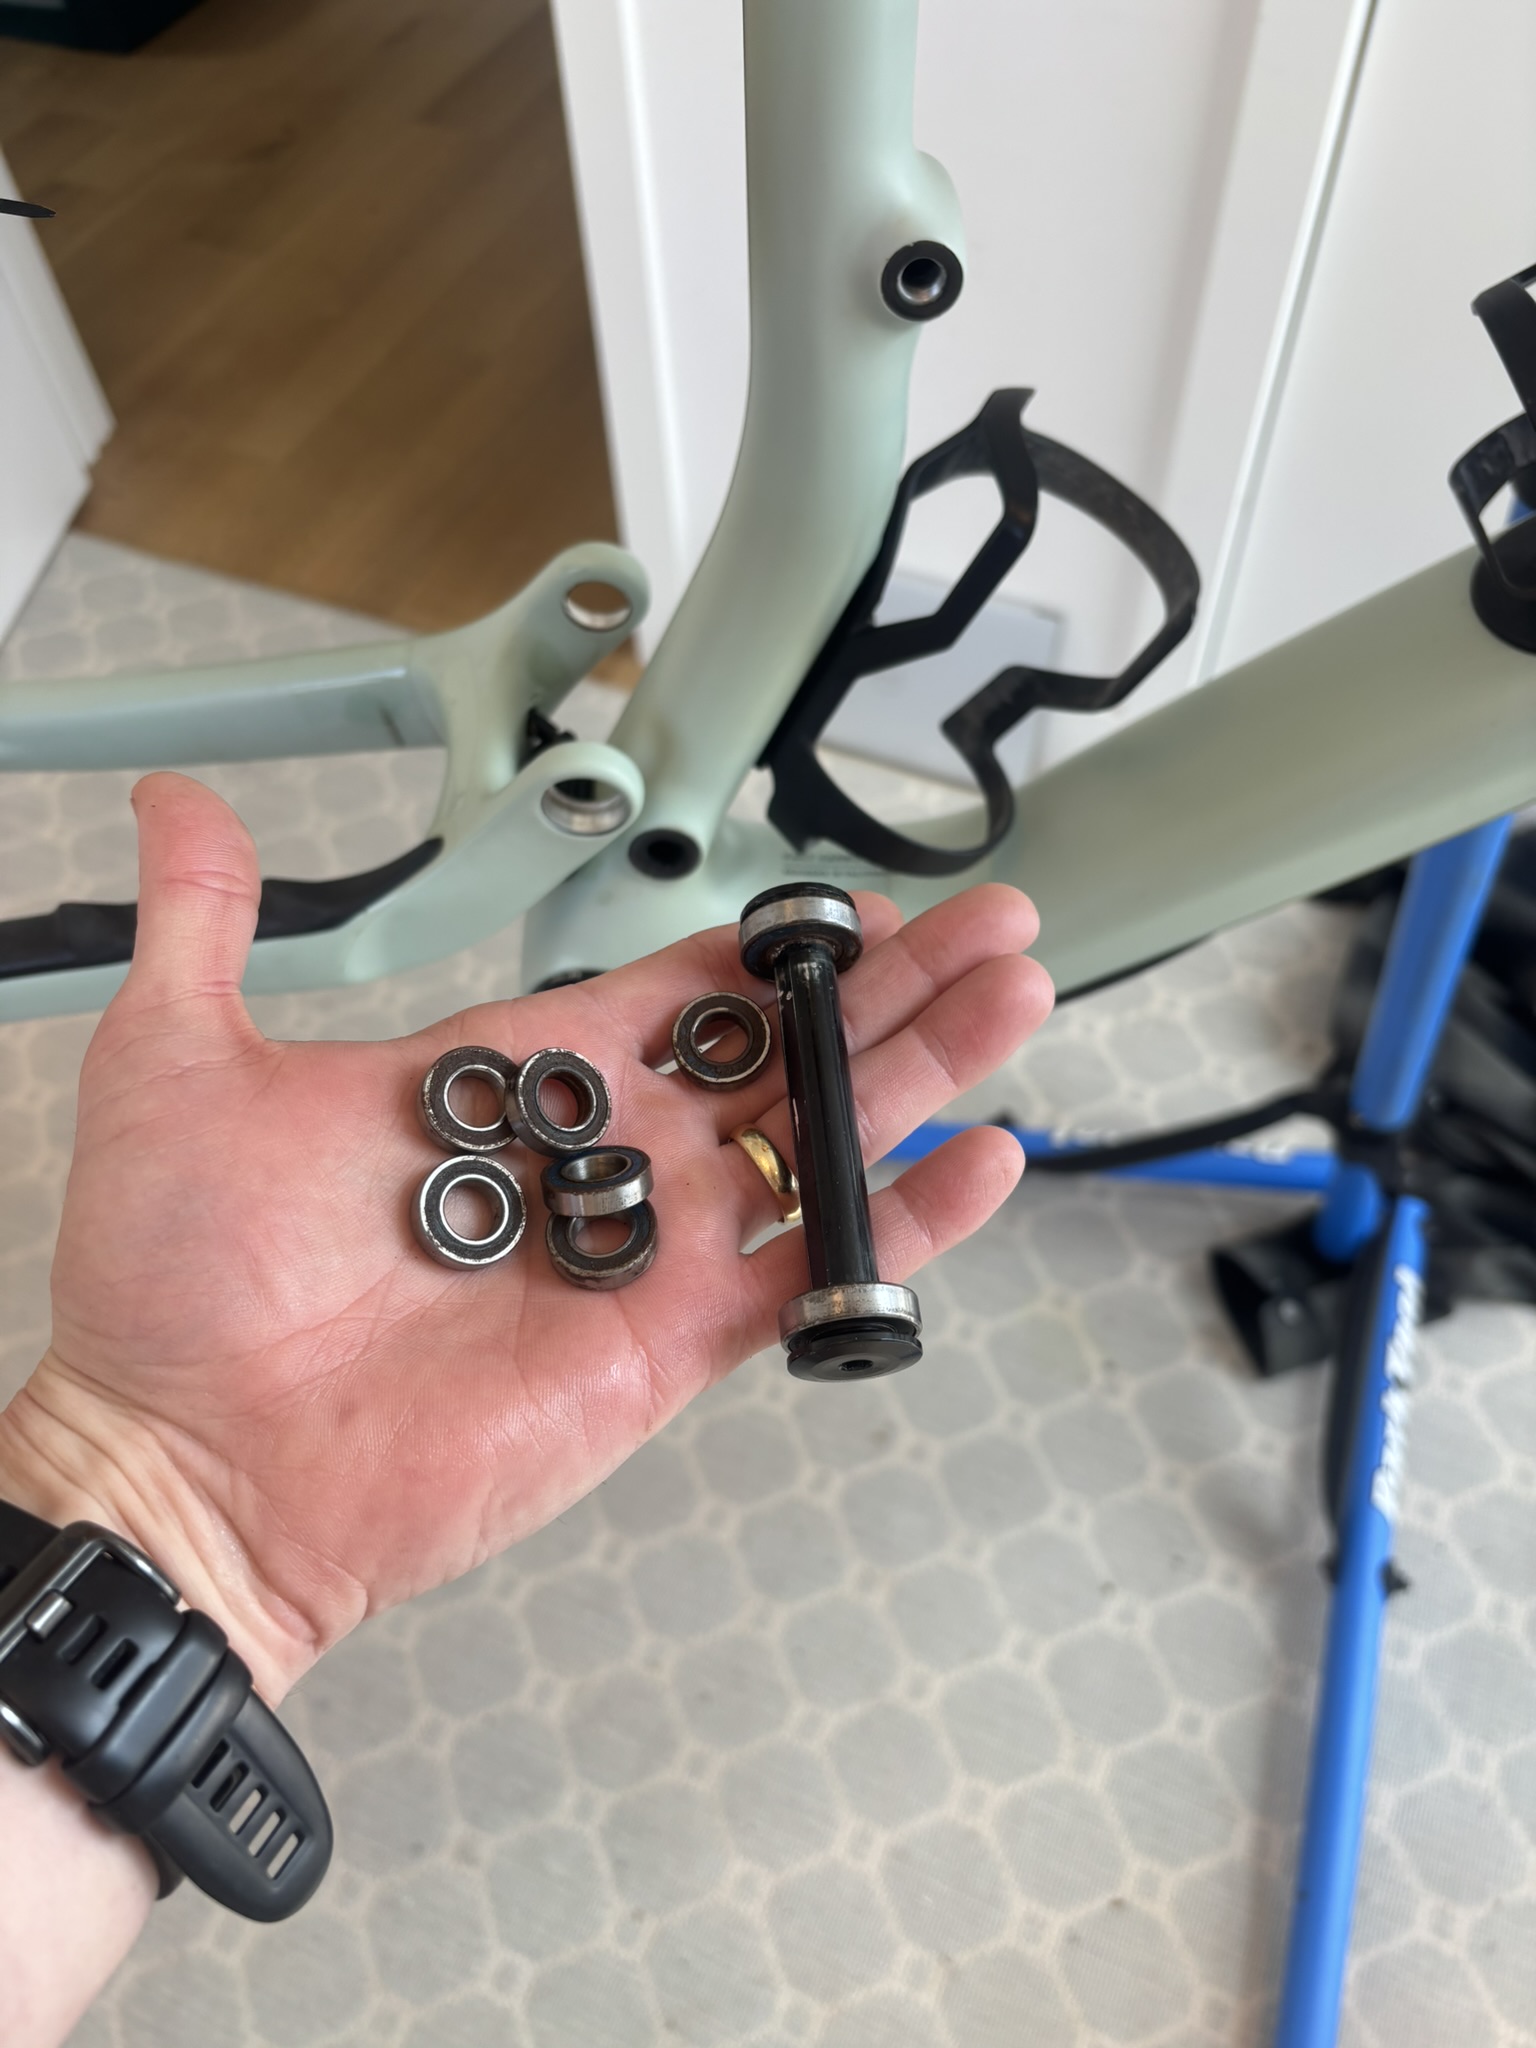
- Total bearings: 8
- Main pivot bearings: 2 × 12 ID × 24 OD × 6 W
- Front aluminum pivot cluster: 6 × 10 ID × 19 OD × 5 W
- Retaining compound: Loctite 603 applied to the outer race before pressing
- Must-watch: Park Tool SBK-1 tutorial video below (even if you’re piecing the kit together)
I did this service on my Epic 8 EVO Pro (120mm Flight Attendant setup). Same frame as the standard Epic 8, but always confirm against your manual.
Official manual PDF (download)
Related content:
- How to Flip the Flip Chip on a Specialized Epic 8
- Specialized Epic 8 EVO Pro – Flight Attendant vs. Stock
Parts & Tools (Complete Shopping List)
1. Bearings — Choose One Path
Upgrade Path: Buy Bearings Individually
- Main pivot: 2 QTY: 12 ID × 24 OD × 6 W
- Front pivot cluster: 6 QTY: 10 ID × 19 OD × 5 W
Enduro Bearings (filter by ID × OD × W) →
i
I opted for stainless steel after seeing a great deal of rust in the original bearings.
OR
Stock Path: Free Specialized Bearing Kit (2024+ Purchases)
Ask your Specialized dealer about a free Epic 8 pivot bearing kit if your bike was purchased in 2024 or later.
i
I grabbed the free kit but installed stainless instead and kept the stock kit as a spare.
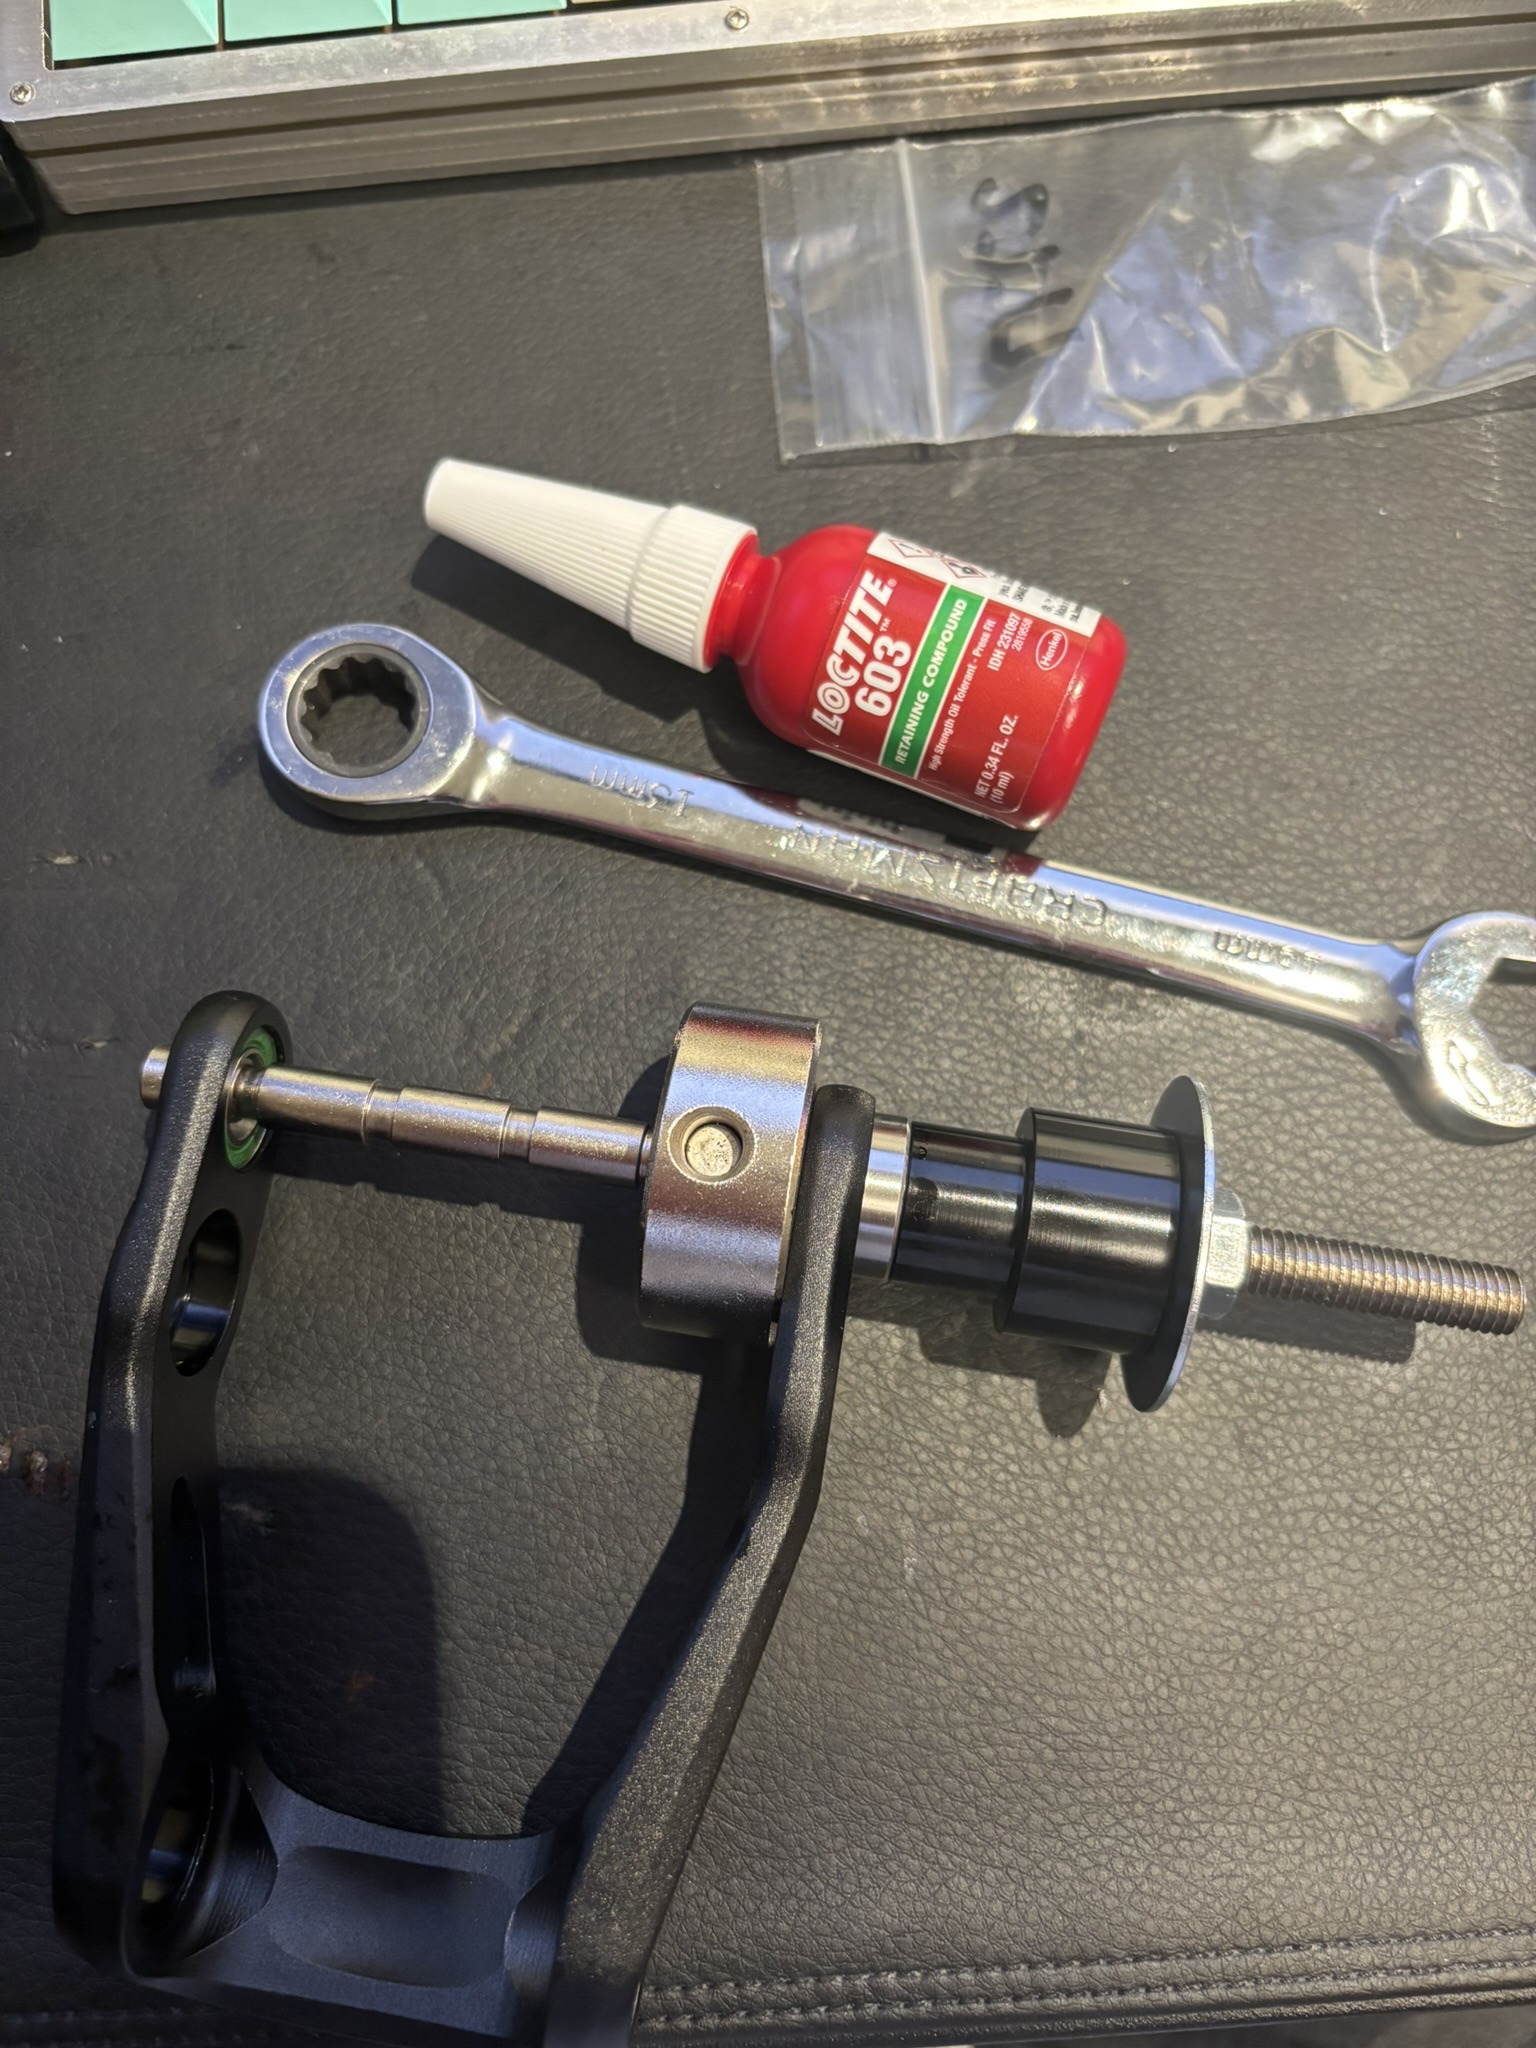
2. Retaining Compound
- Loctite 603 (10ml)
i
Apply a thin film to the cleaned outer race only before pressing. This stuff was oddly difficult to track down - be wary of Amazon sellers selling it a price way below others - I ordered mine from bikeparts.com at the link above.
3. Pivot Hardware (Optional)
Epic 8 Pivot Bolt Kit — Part # S230500002
i
Replace hardware if any axles are corroded or if bearing play has resulted in worn hardware.
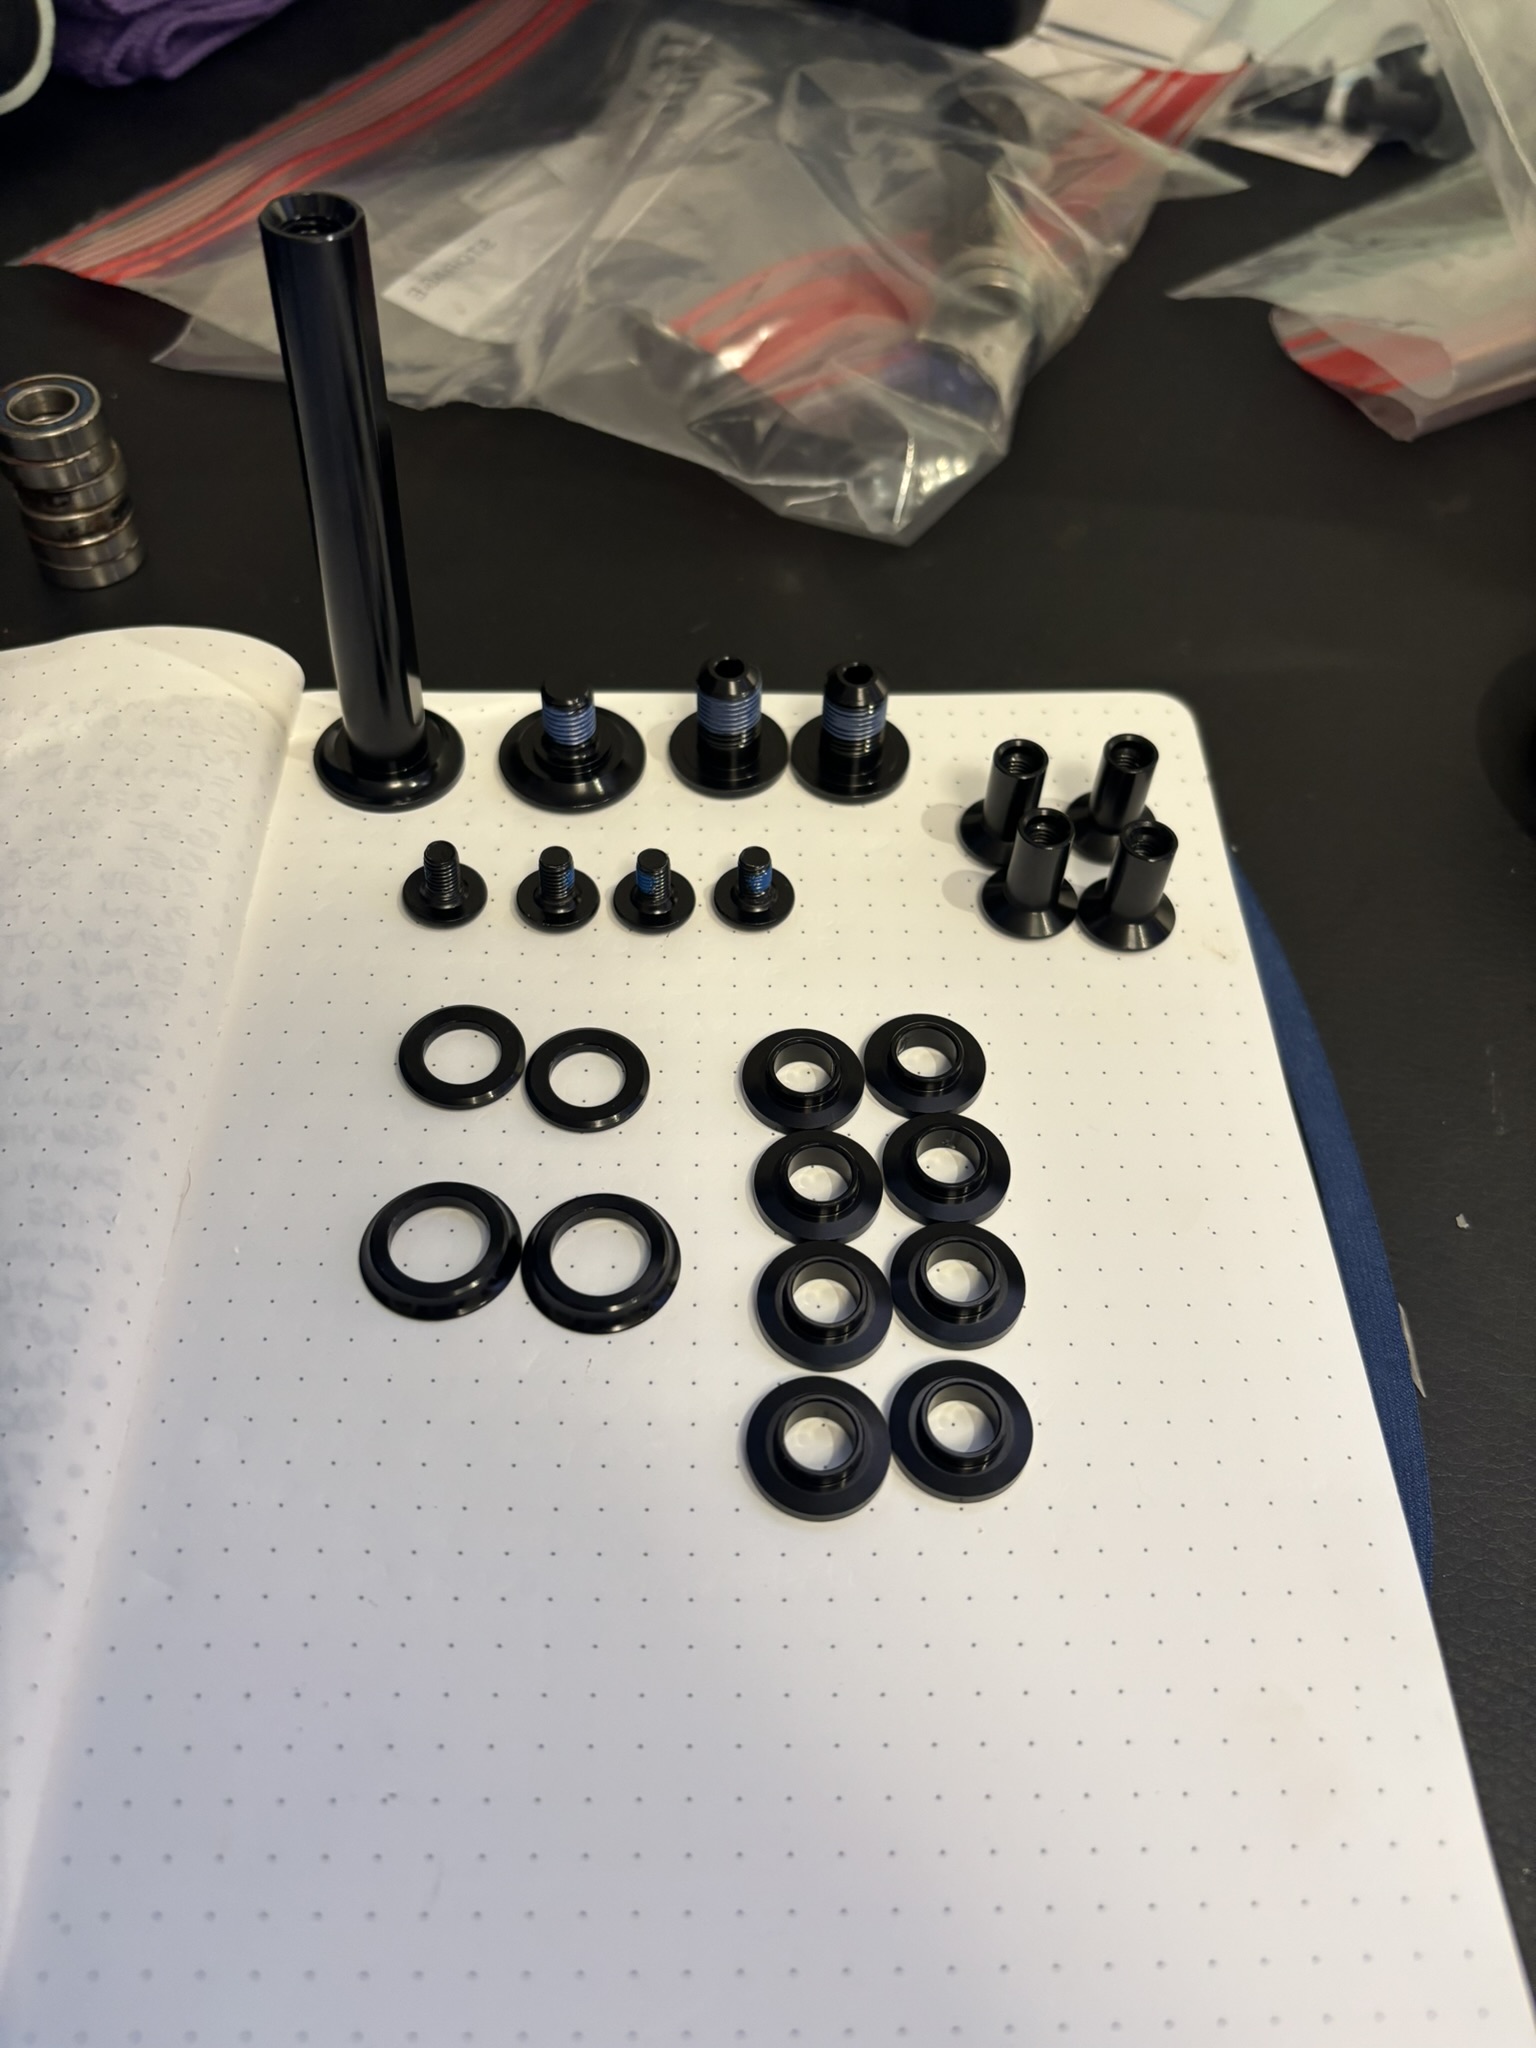
4. Bearing Press & Extraction Tools — Choose One

i
Less complicated than the option below and the best route if you plan to replace pivot bearings on multiple bikes.
OR
Piece it together and only buy what you need for the Epic 8 (what I did)
- #2758 — 19mm OD extractor cup / drift
- #2763 — 24mm OD extractor cup / drift
- #2759 — 20.6mm OD extractor cup / drift (used to aid in staging one of the trickier bearings)
- #2777 — 10mm bearing pilot
- #2778 — 12mm bearing pilot
- #2771 — 10mm ID extractor stud
- #2772 — 12mm ID extractor stud
- #2752 — shaft
- #2753A — magnetic back plate
- #2786 — back plate extension (used to aid in staging one of the trickier bearings)
- M8 nut + washer + fender washers (DIY handle - ParkTool handle was out of stock)
5. Consumables & Support Tools
 Microfiber cloths
 Watch This Before You Start (SBK-1 Tutorial)
Whether you’re buying the full SBK-1 kit or piecing it together from spare parts, watch this entire video first. Everyone doing this job should watch it.
It will save you from:
- pressing bearings in crooked
- using the wrong pilot or extractor stud
- damaging paint or aluminum pivot surfaces
- fighting the tool unnecessarily
Step-by-Step Overview
I didn’t document every micro-step with staged removal photos, but this is the exact sequence I followed and what I’d recommend.
-
Remove chain
-
Remove rear wheel
-
Remove cranks
-
Remove shock
-
Support the rear triangle
- I supported mine by tying the rear triangle up with zip ties to the seat rails while the bike was in the stand
-
Remove pivot hardware
- Important: always loosen/remove from the bolt head side, not the axle side, to avoid stripping hardware
-
Extract all bearings
- Use the correct extractor stud and cup for each size
- Make sure the extractor is fully seated behind the bearing
- Confirm the cup sits flat against the frame
- Turn the shaft slowly and steadily — do not rush it
- If it feels unusually tight, stop and re-seat the tool
- Do not force a crooked extractor
If the main pivot axle is seized to a bearing:
- Remove the bolt from one side completely
- Insert a large Torx driver (something with a flat point) into the hollow center of the axle
- Apply WD-40 Specialist penetrating oil in the stuck side
- Let it sit
- Gently tap the Torx driver with a hammer to slowly work the axle and bearing out
- Reapply penetrant as needed
Inspect the axle after removal. If it’s pitted or corroded, replace it.
-
Clean everything thoroughly
- bores, hardware, and new bearing outer races
-
Apply Loctite 603 to the bearing outer race
-
Press all new bearings
-
Grease axles, bolt heads, and threads where appropriate
-
Reassemble and torque to spec (see manual reference below)
-
Reinstall shock, cranks, chain, and rear wheel
-
Final check
- lightly cycle suspension, check for play, verify everything is torqued, give the loctite 603 24hrs to cure, then ride
Photo Walkthrough
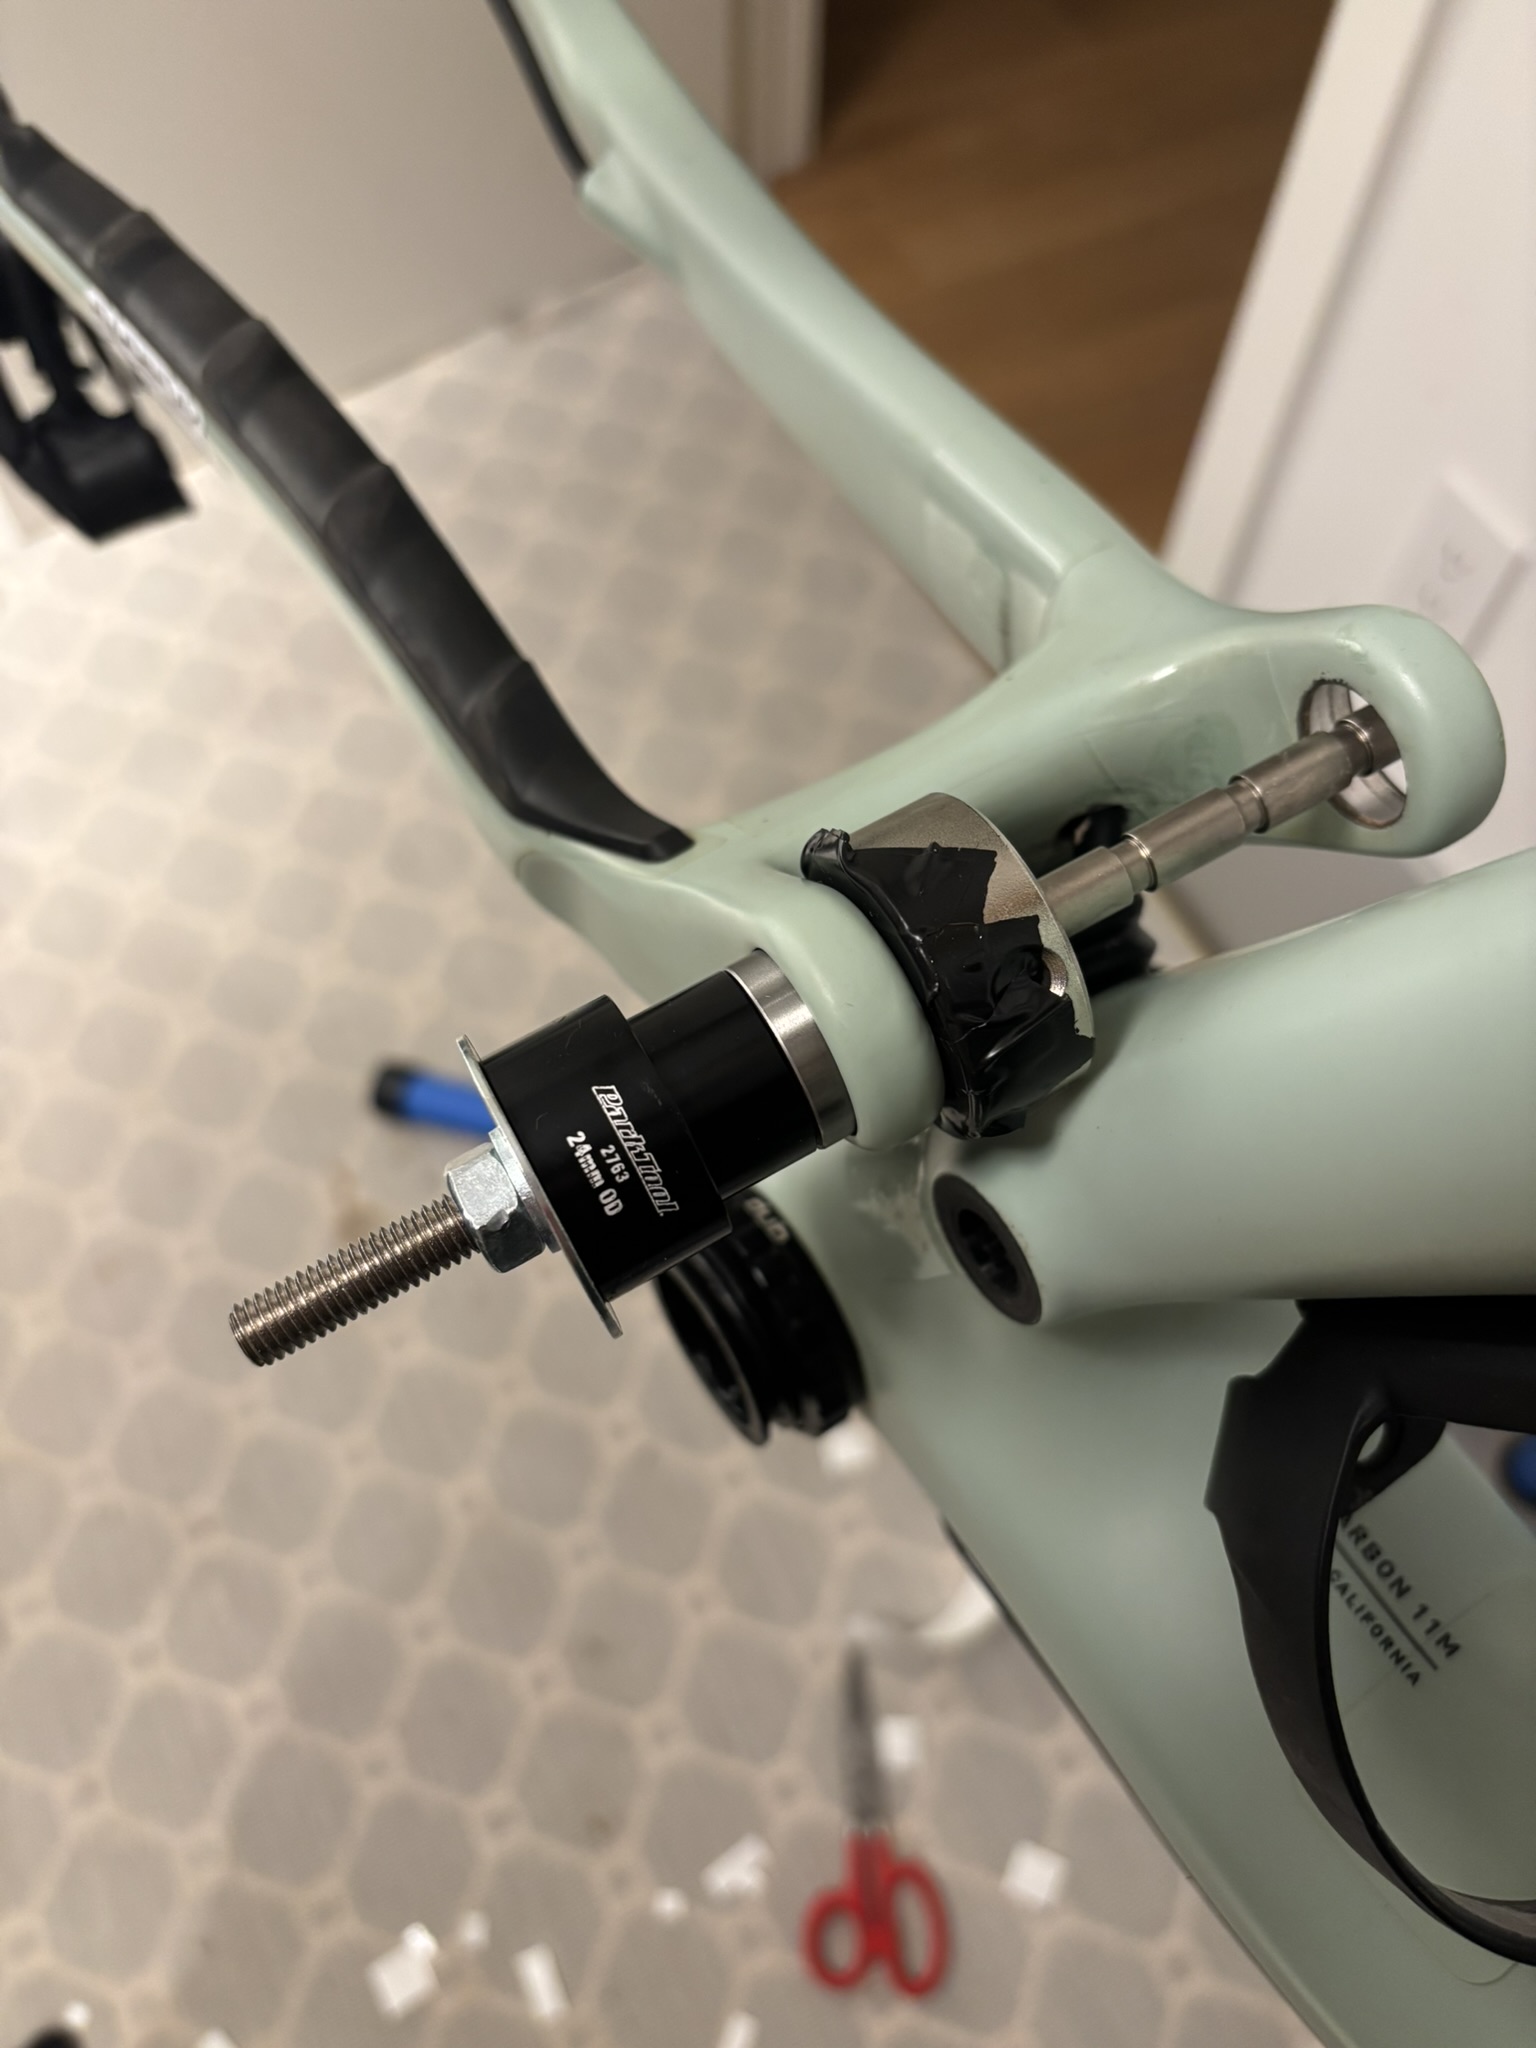
Protecting the Frame and Paint
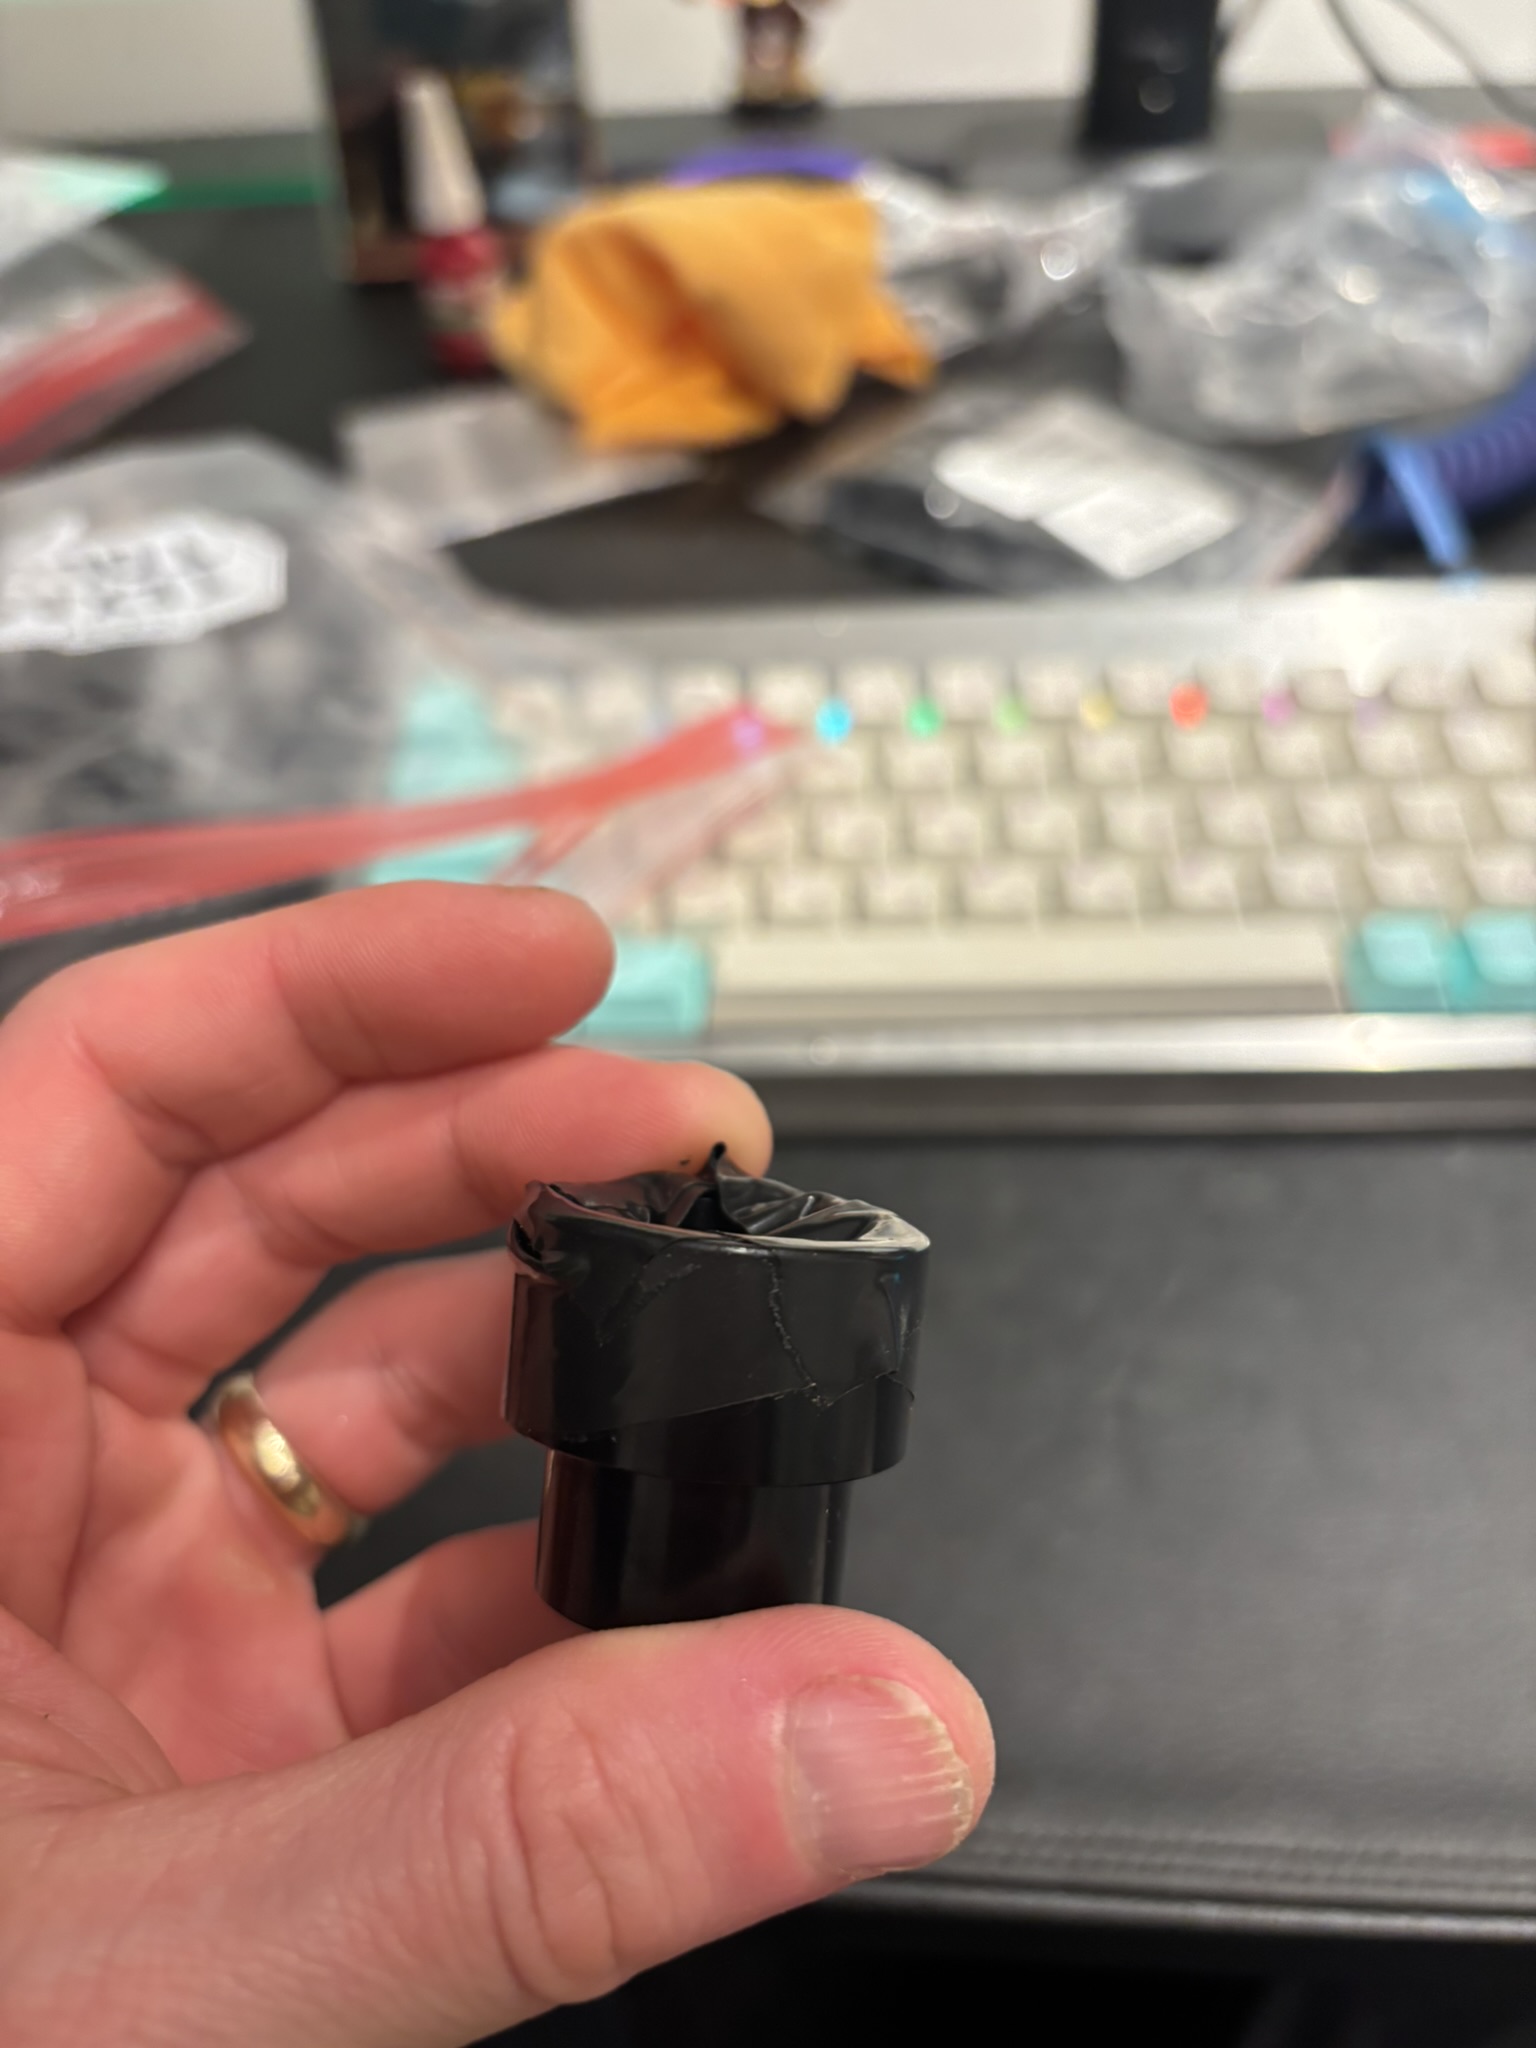
Electrical tape on the extractor cup to avoid scratching paint around the main pivot bearing bores.
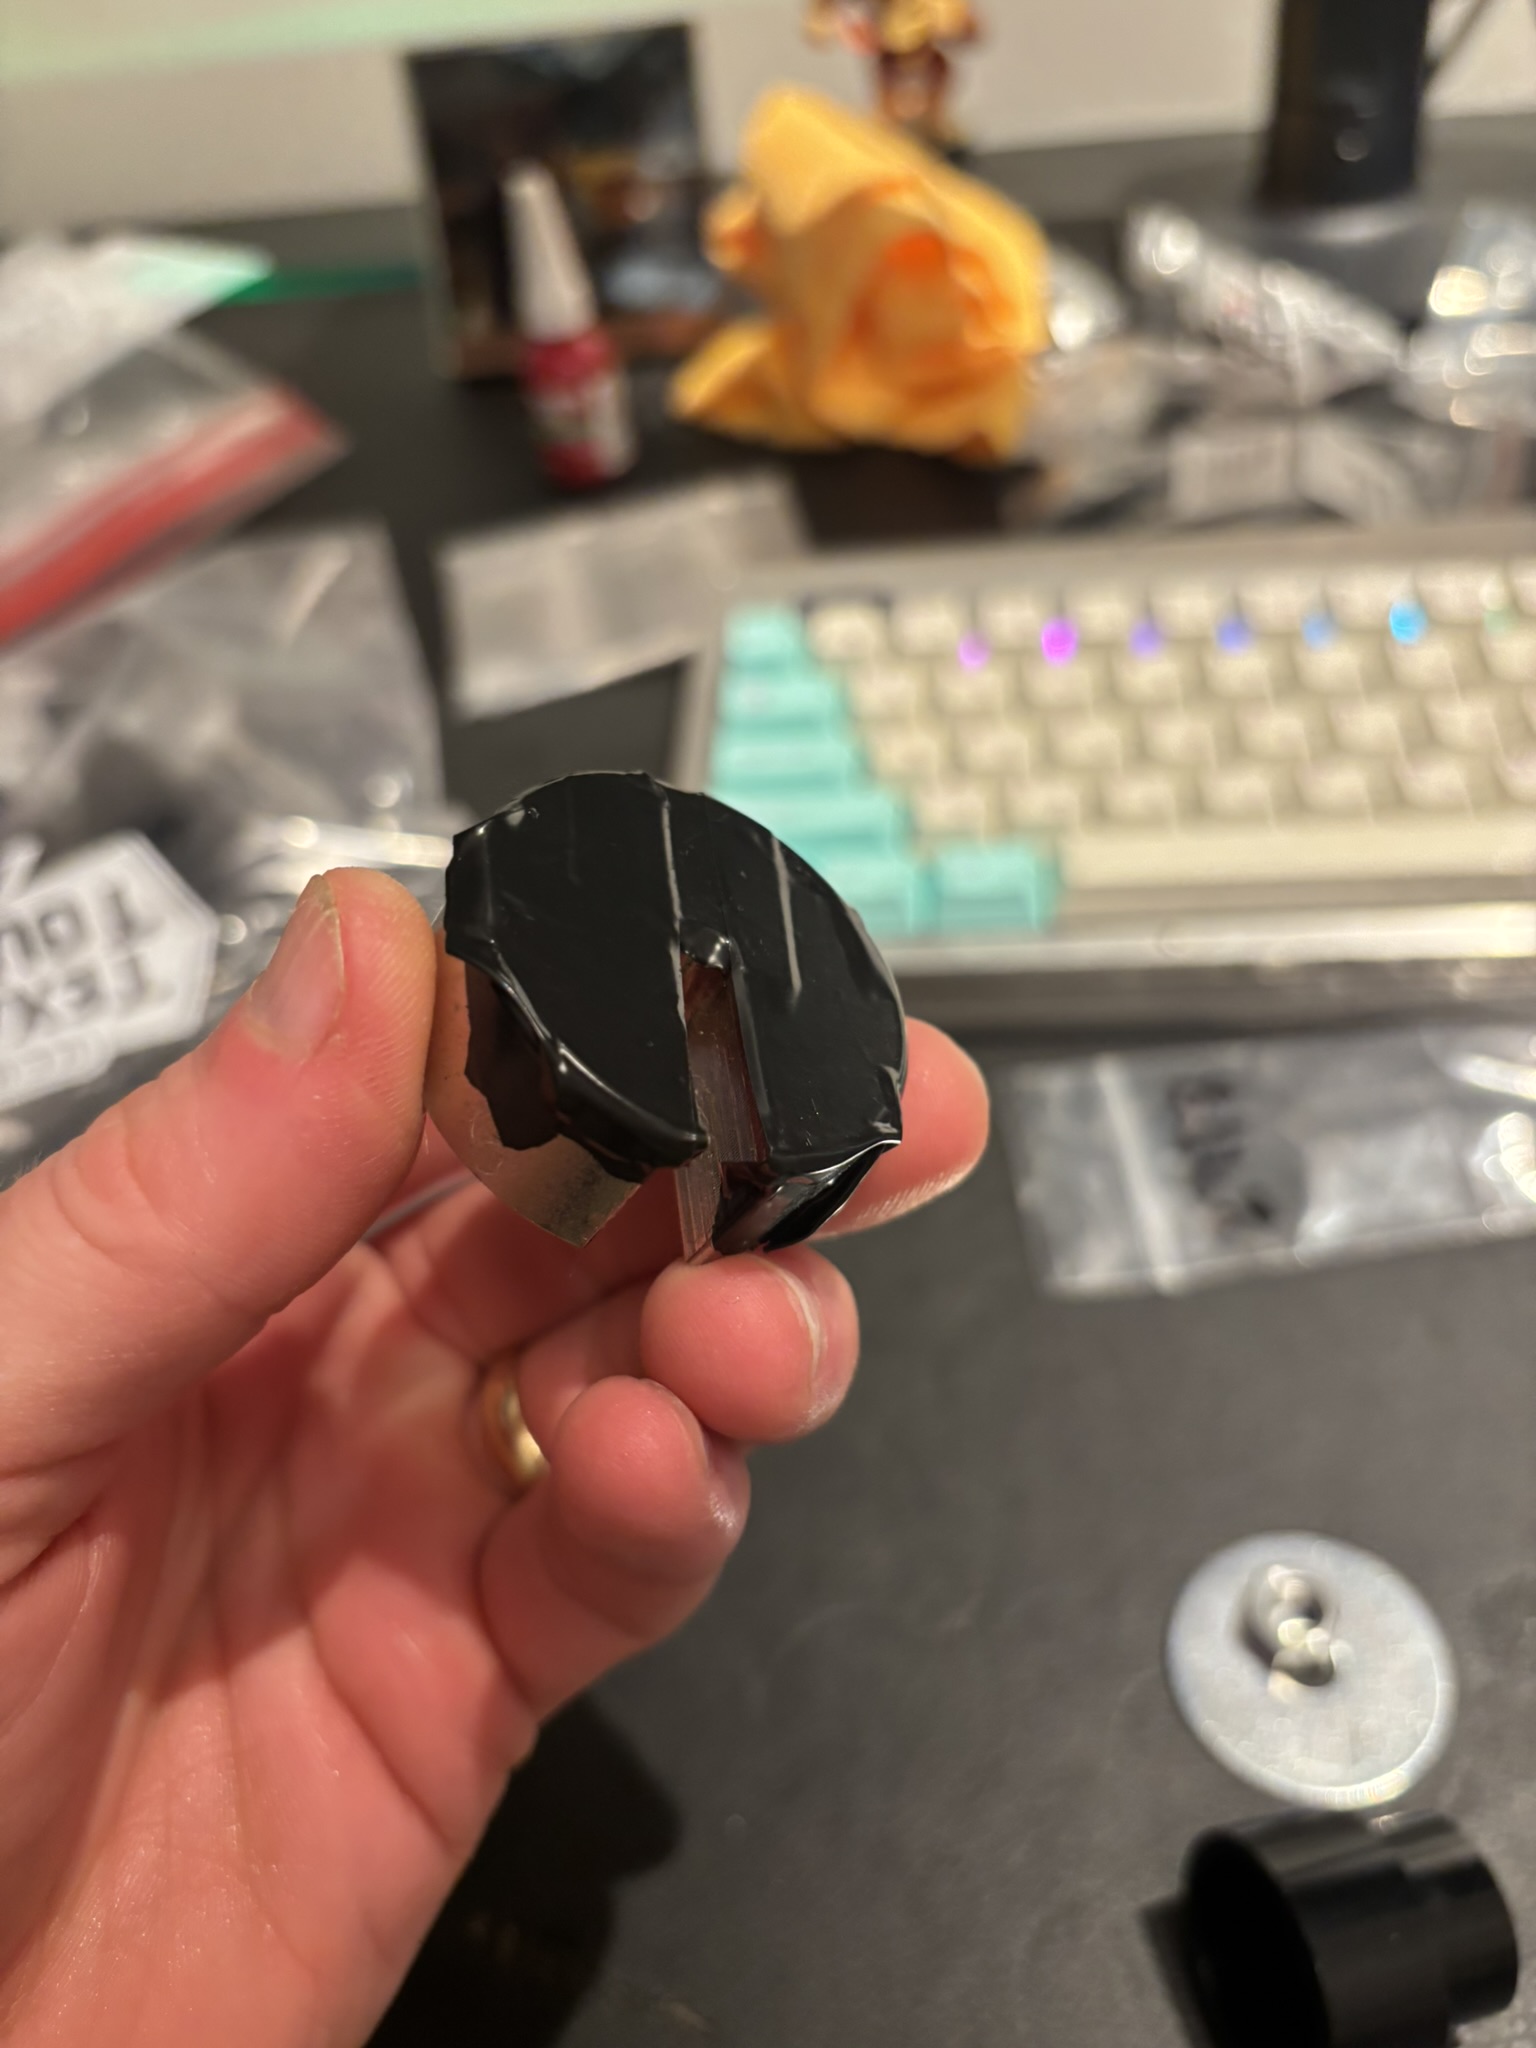
Electrical tape on the magnetic back plate to protect the same area during pressing.
Rear Triangle Support During Disassembly
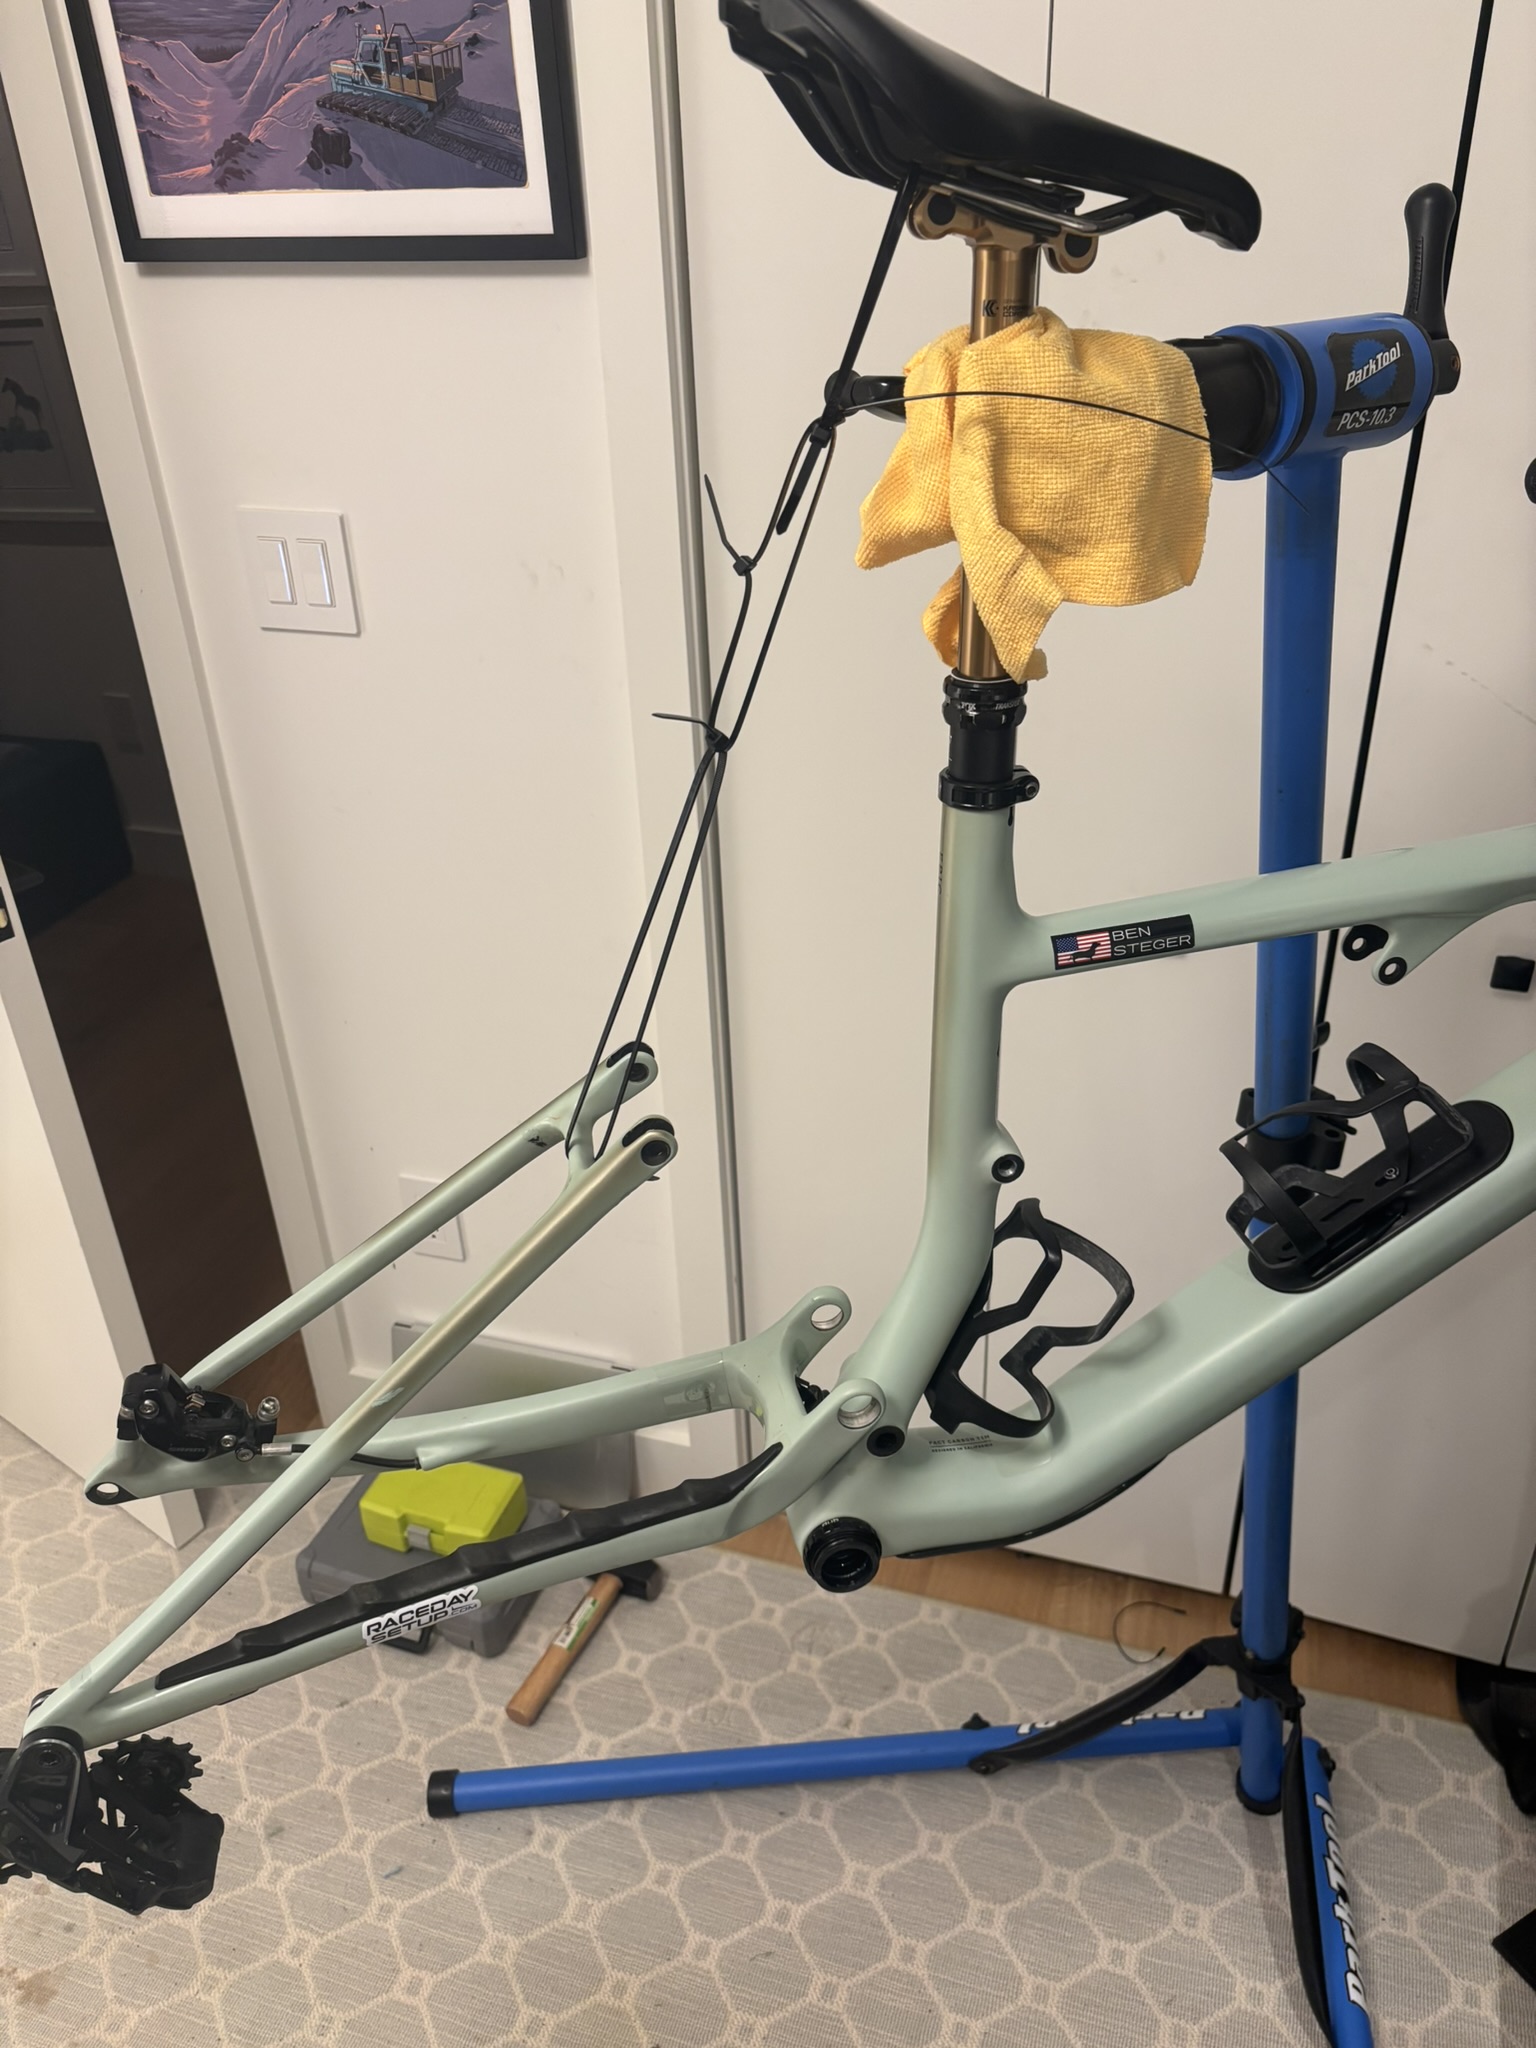
Rear triangle supported by zip ties to the seat rails in the stand (brake line still intact).
Main Pivot Bearings
Main pivot bearing staged for pressing (go slow and make sure it starts perfectly square).
New pivot hardware laid out before reassembly.
Front Aluminum Pivot Cluster (The Fussy Part)
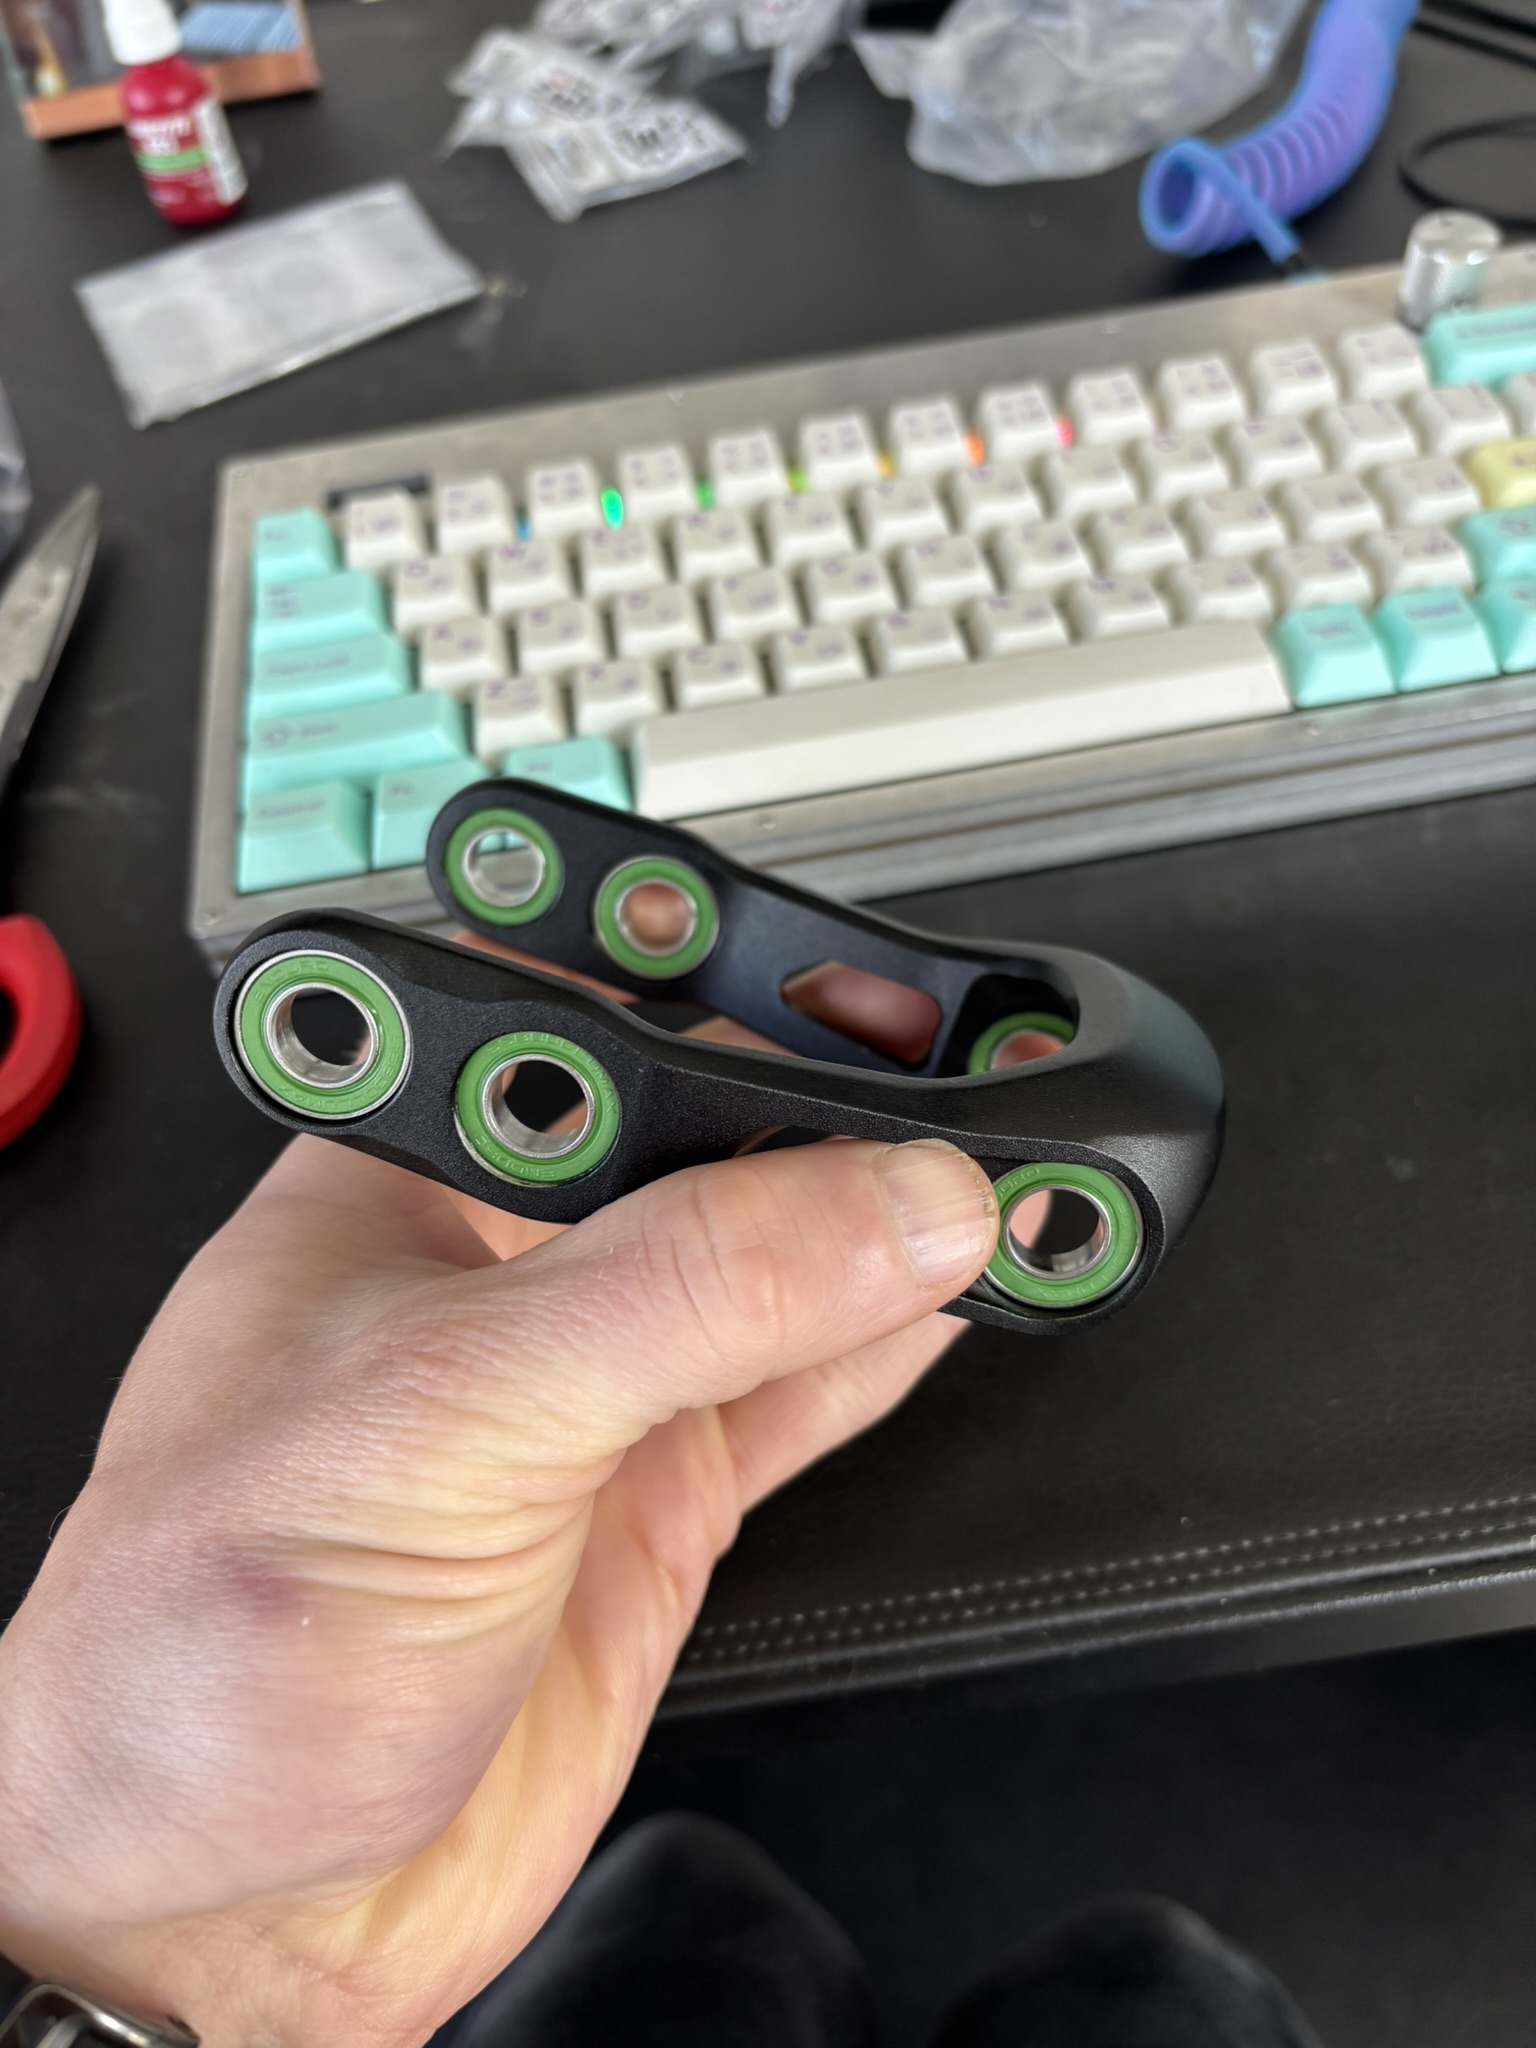
Aluminum pivot piece with all new bearings pressed in.
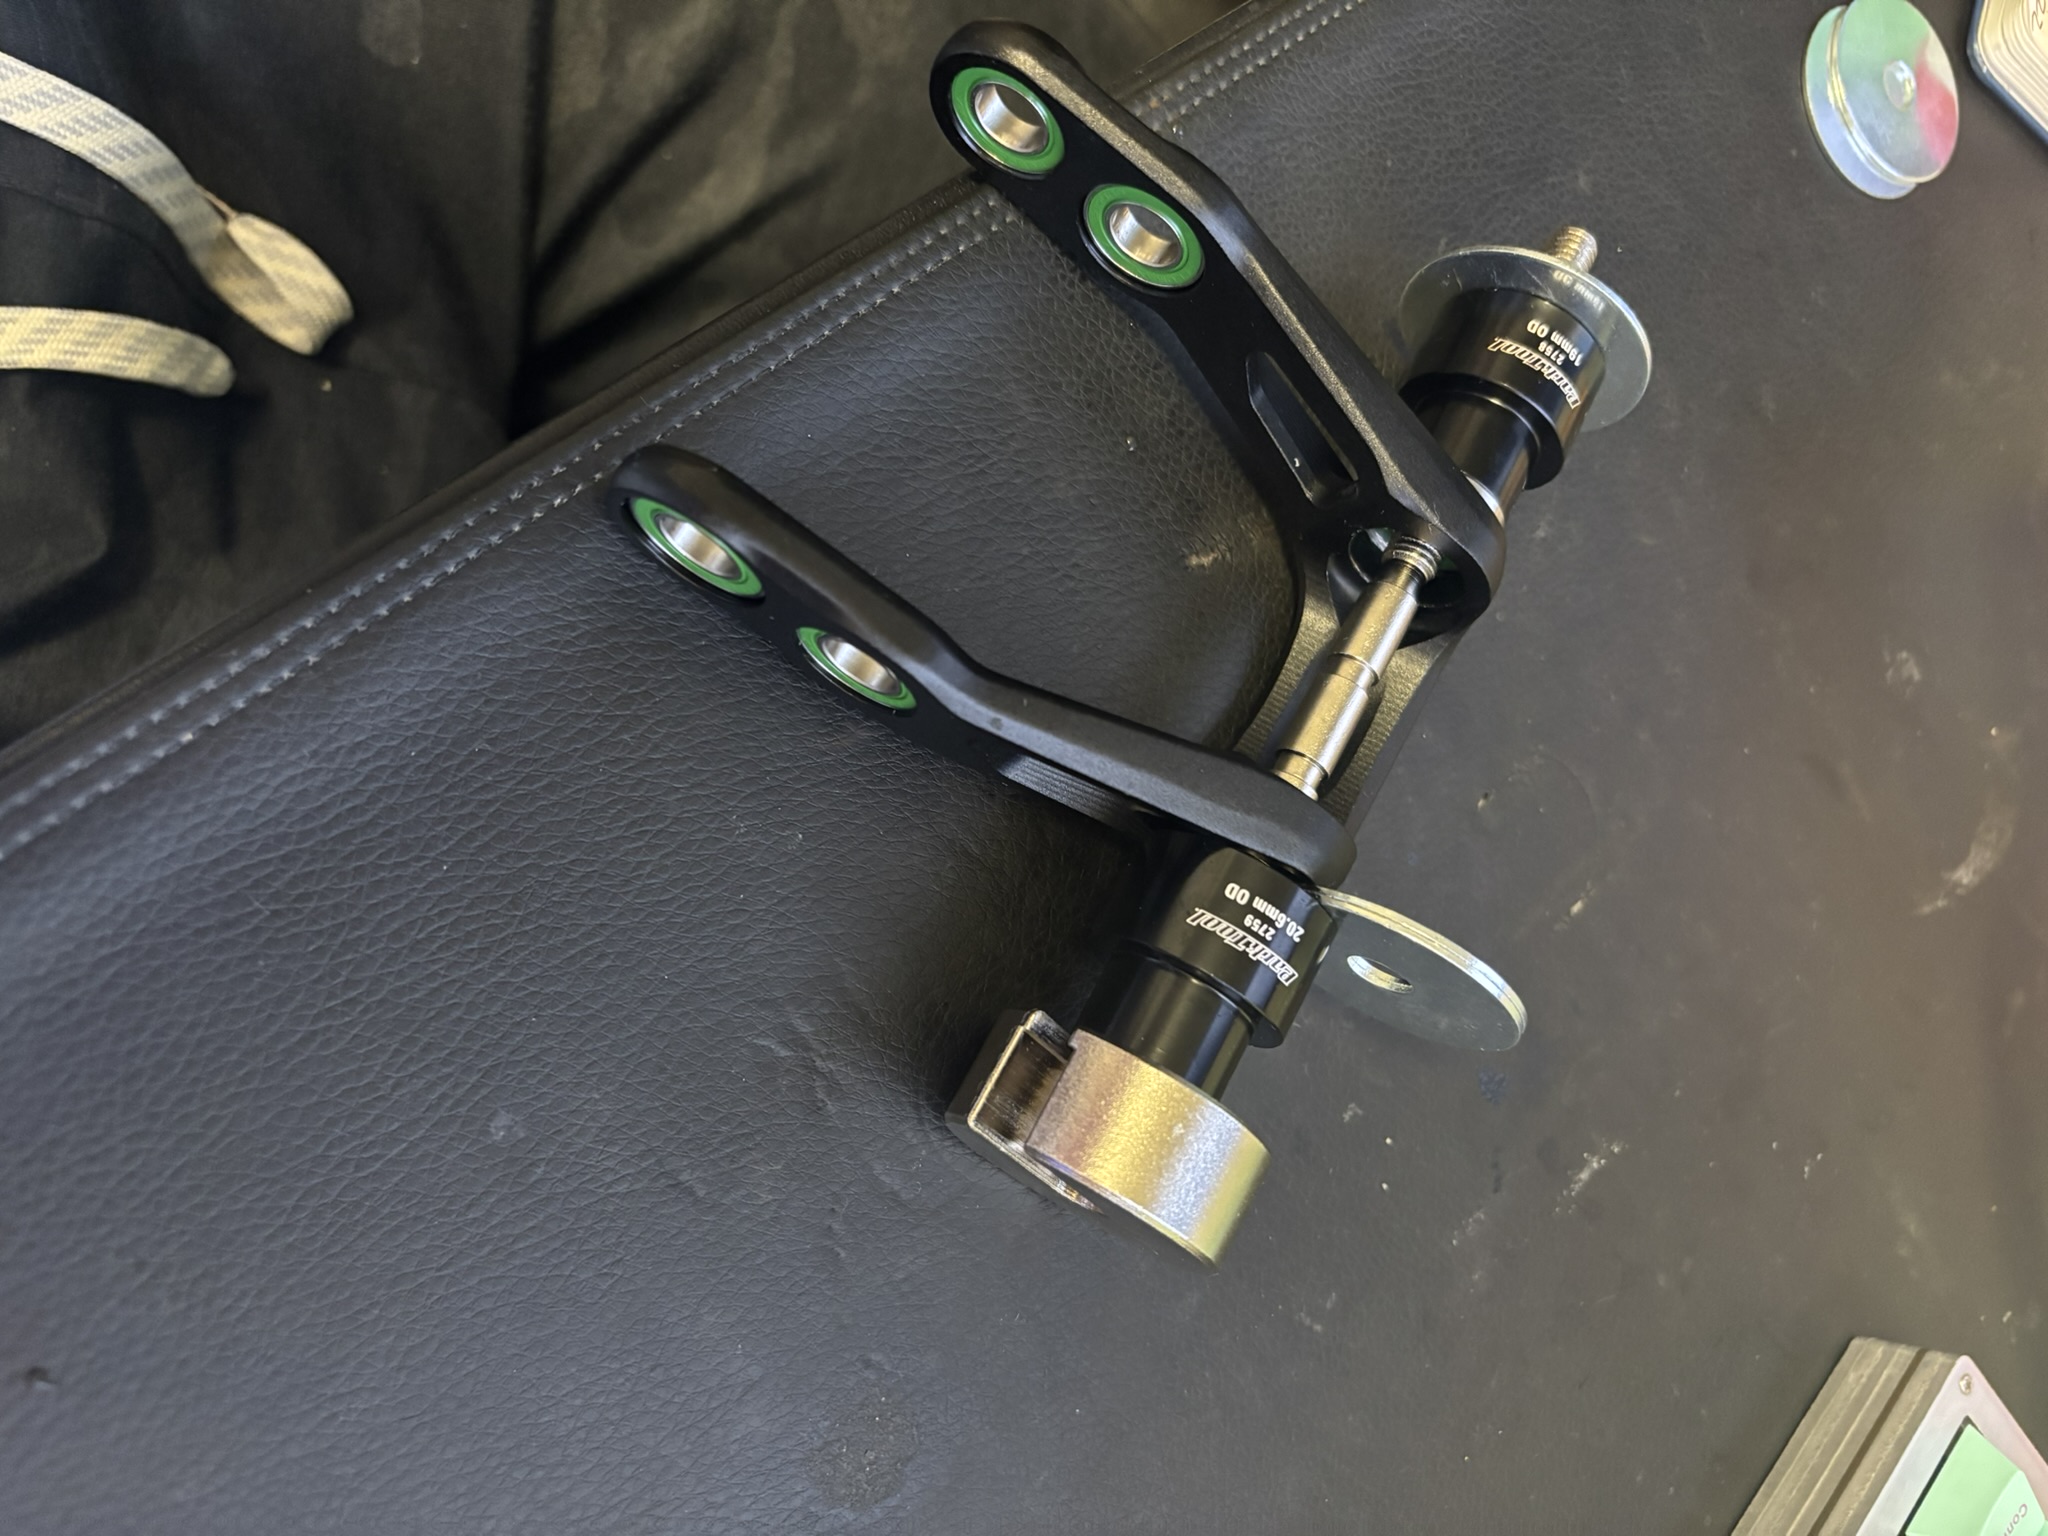
One of the trickier presses: I shimmed the 20.6mm cup with washers to get a flat pressing surface.
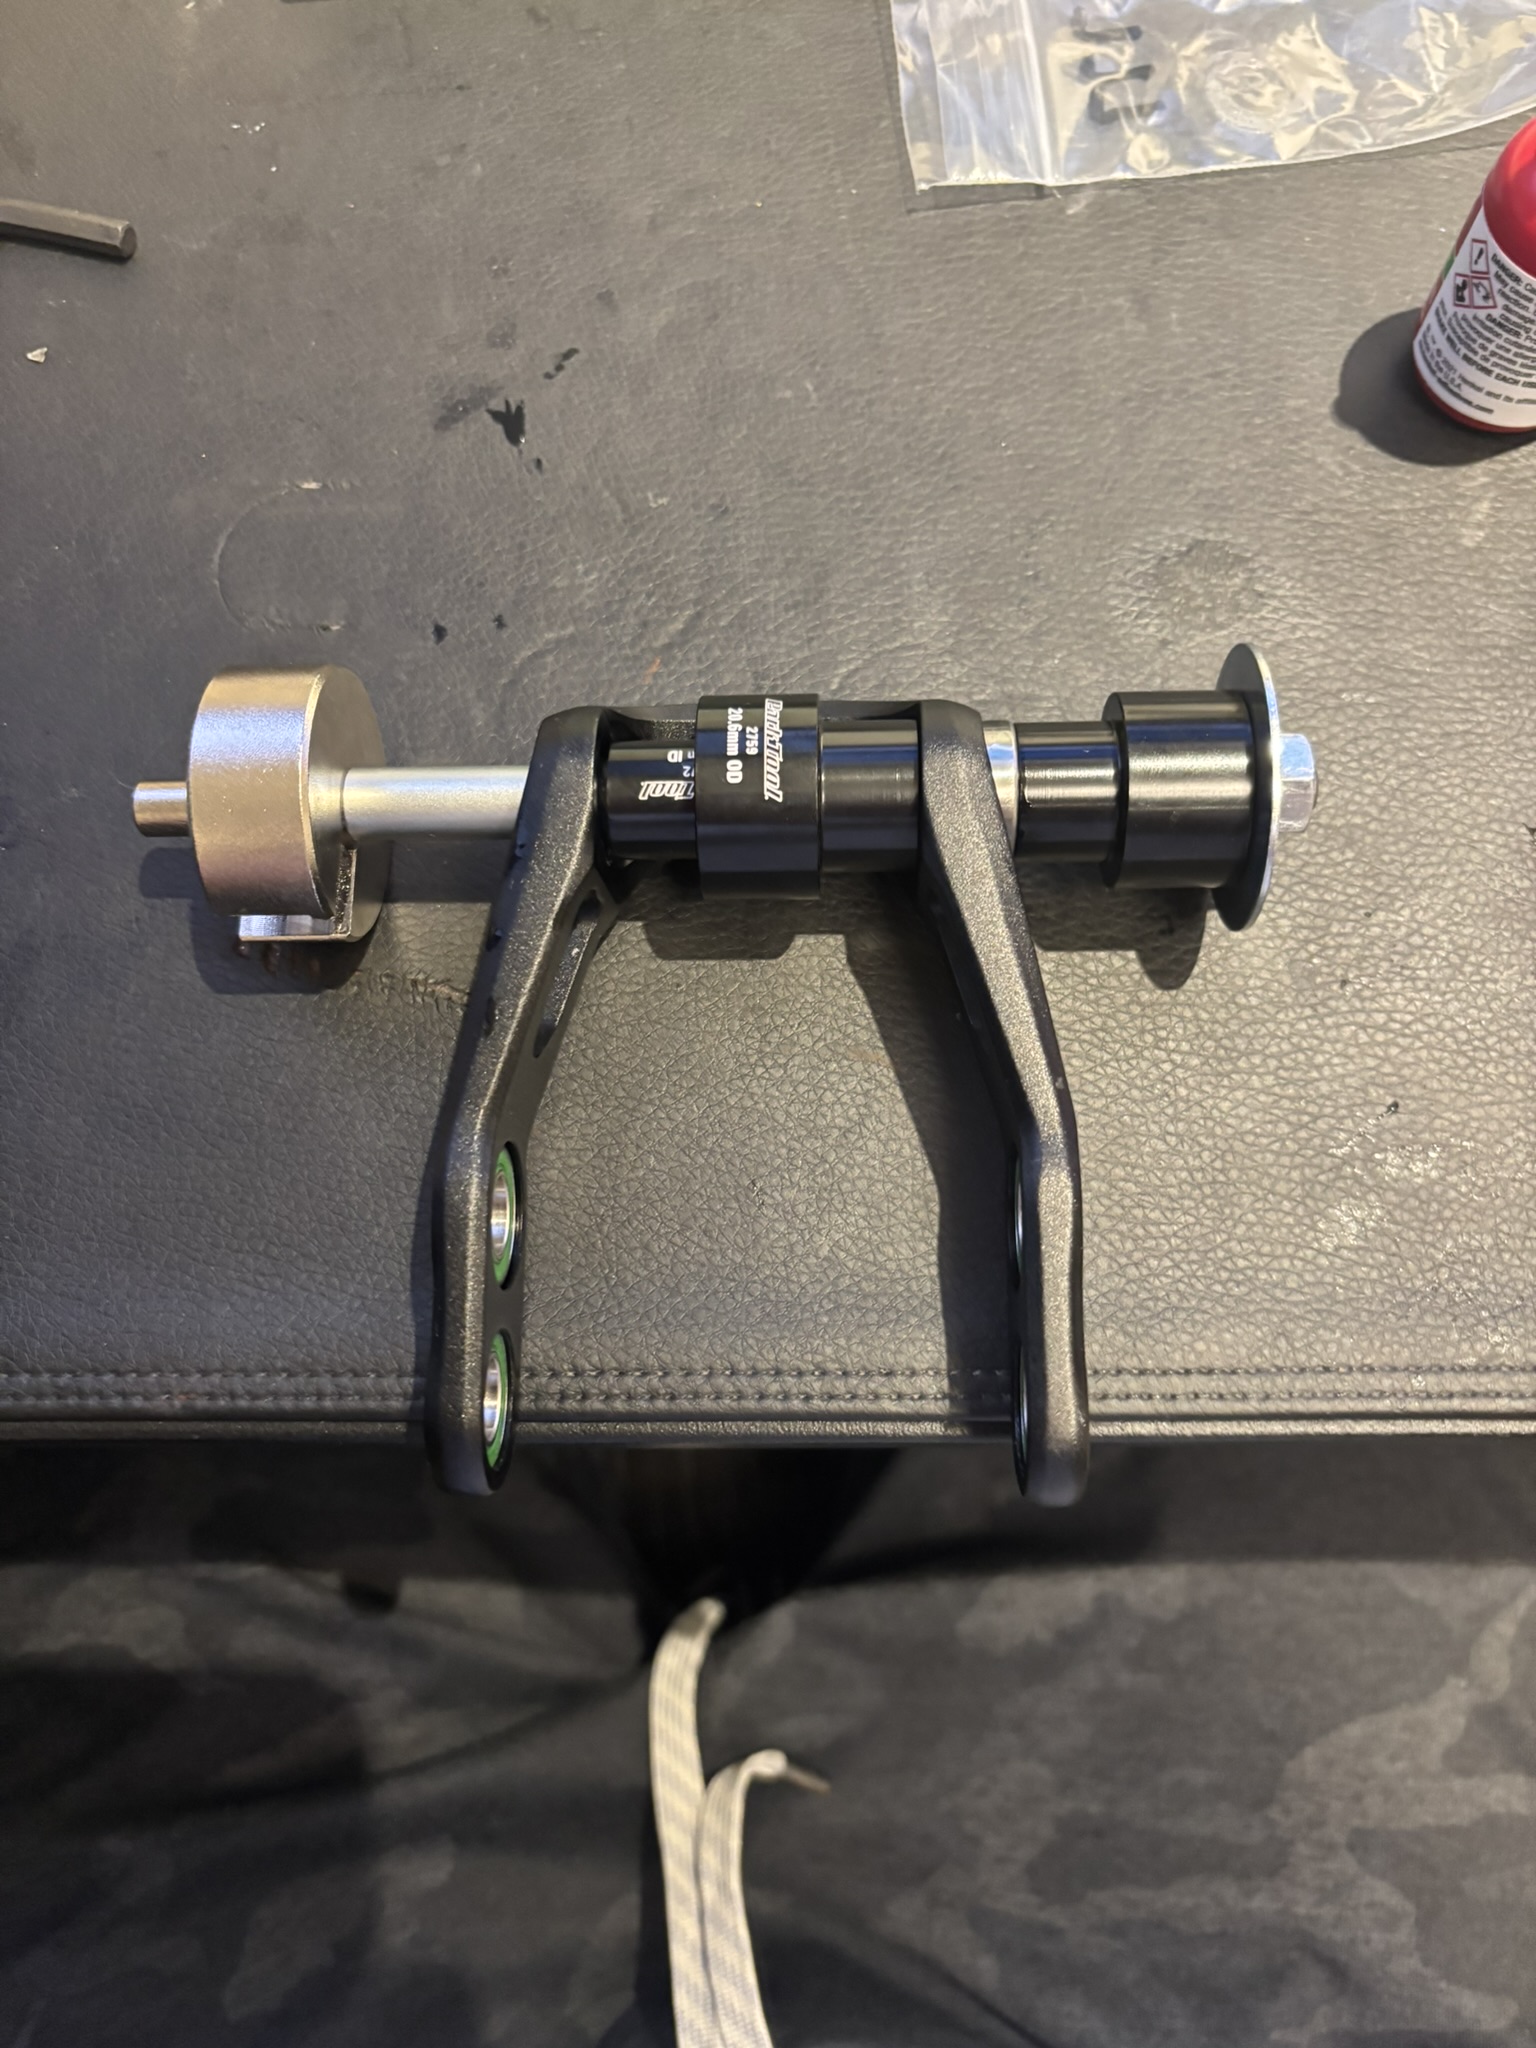
Pressing one of the front bearings using the back plate extension.
Bearing staged for pressing into the aluminum pivot piece (reset immediately if it starts crooked).
Why I Replaced Mine
I had three symptoms:
- a little rear-end play
- a dull clunk on flat landings
- rust weeping from a couple pivot locations
Once I had the rear end apart, one of the main pivot bearings was corroded badly enough that it had seized to the axle.
While inspecting parts, I also noticed that the extra play had allowed a couple pivot bolt heads to start lightly wearing into the aluminum pivot piece. It wasn’t severe in my case, but it’s the kind of wear that can turn a bearing job into a “replace the aluminum pivot assembly” job if you wait too long.
Manual Reference
Here are the key sections I referenced from the manual for reassembly, hardware placement, and torque specs.
Download the full manual: 2024 Epic / Epic EVO User Manual (PDF) →
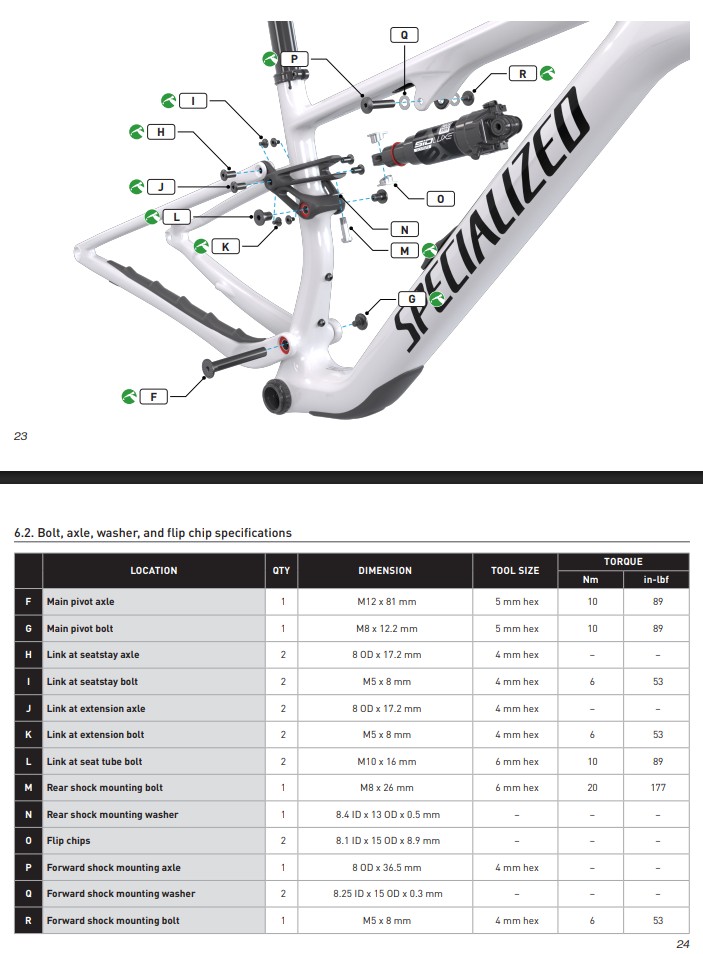
Pivot + shock hardware placement and torque (screenshot from Specialized manual).
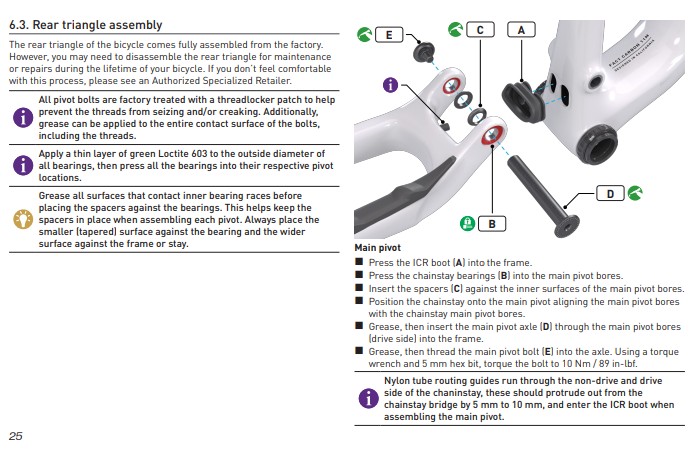
Main pivot detail + tips (screenshot from Specialized manual).
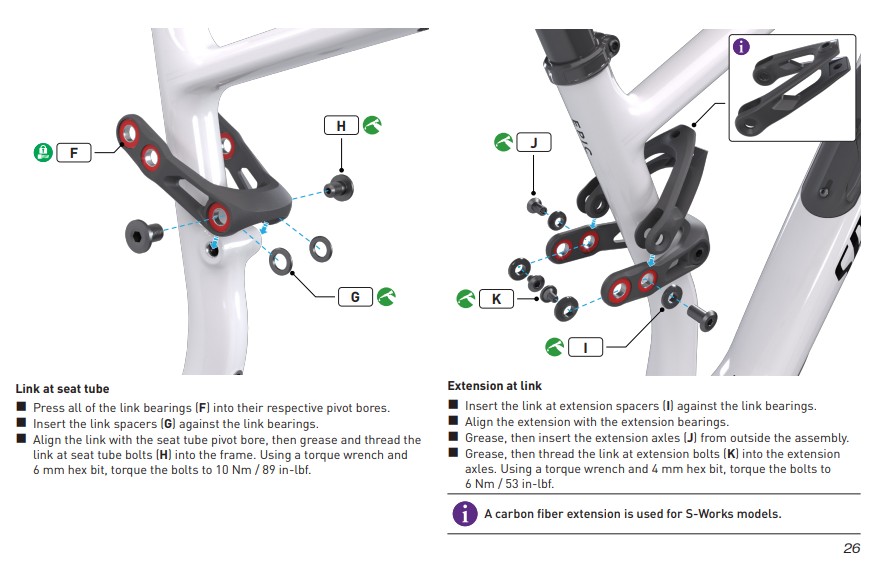
Link + shock extension assembly (screenshot from Specialized manual).
Common Mistakes
- Pressing a bearing in slightly crooked and hoping it straightens out
- Using too much retaining compound instead of a thin film on the outer race
- Waiting until there is obvious clunking (play can start wearing aluminum parts)
- Reusing corroded pivot hardware
- Riding immediately without cure time
- Not being patient with bearing removal / pressing
FAQ
How many pivot bearings does the Epic 8 use?
Eight total — two 6901-size bearings in the main pivot (12×24×6) and six 6800-size bearings in the front aluminum pivot cluster (10×19×5).
Can I get a free pivot bearing kit from Specialized?
If your Epic 8 was purchased in 2024 or later, you can get a free pivot bearing kit through a Specialized dealer via the warranty process. I picked mine up through Specialized Austin and kept it as a spare after installing stainless bearings.
Where do you apply Loctite 603?
Apply a thin film to the cleaned outer race of the bearing before pressing.
Do I need to replace the pivot bolt kit too?
Not always. If hardware is clean and corrosion-free it can often be reused. I replaced mine because the main pivot axle/hardware was in rough shape.
Do I need to watch the SBK-1 video if I’m not buying the full kit?
Yes. The technique and order-of-operations still apply when you piece the kit together from spare parts (pilots, studs, cups, back plate, extension). It’s the fastest way to avoid mistakes.
Keep Reading
How to Flip the Flip Chip on a Specialized Epic 8
Epic 8 vs Epic 8 EVO (and my Flight Attendant setup)
Related Gear
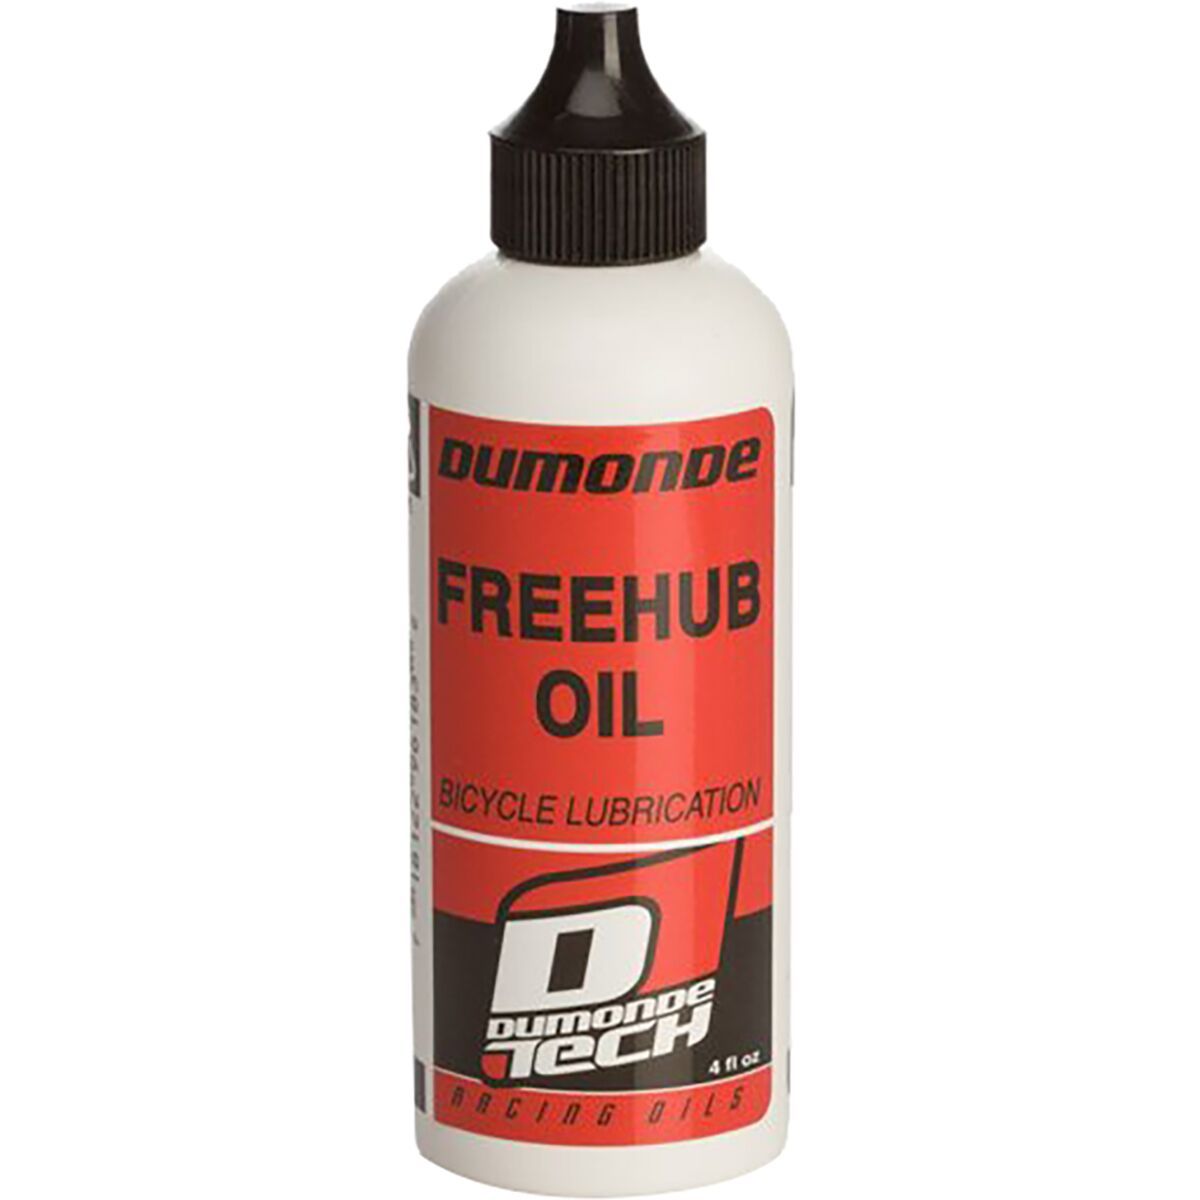
Dumonde Tech Freehub Oil
Low-viscosity lubricant for keeping freehubs in optimal condition.
Read the review →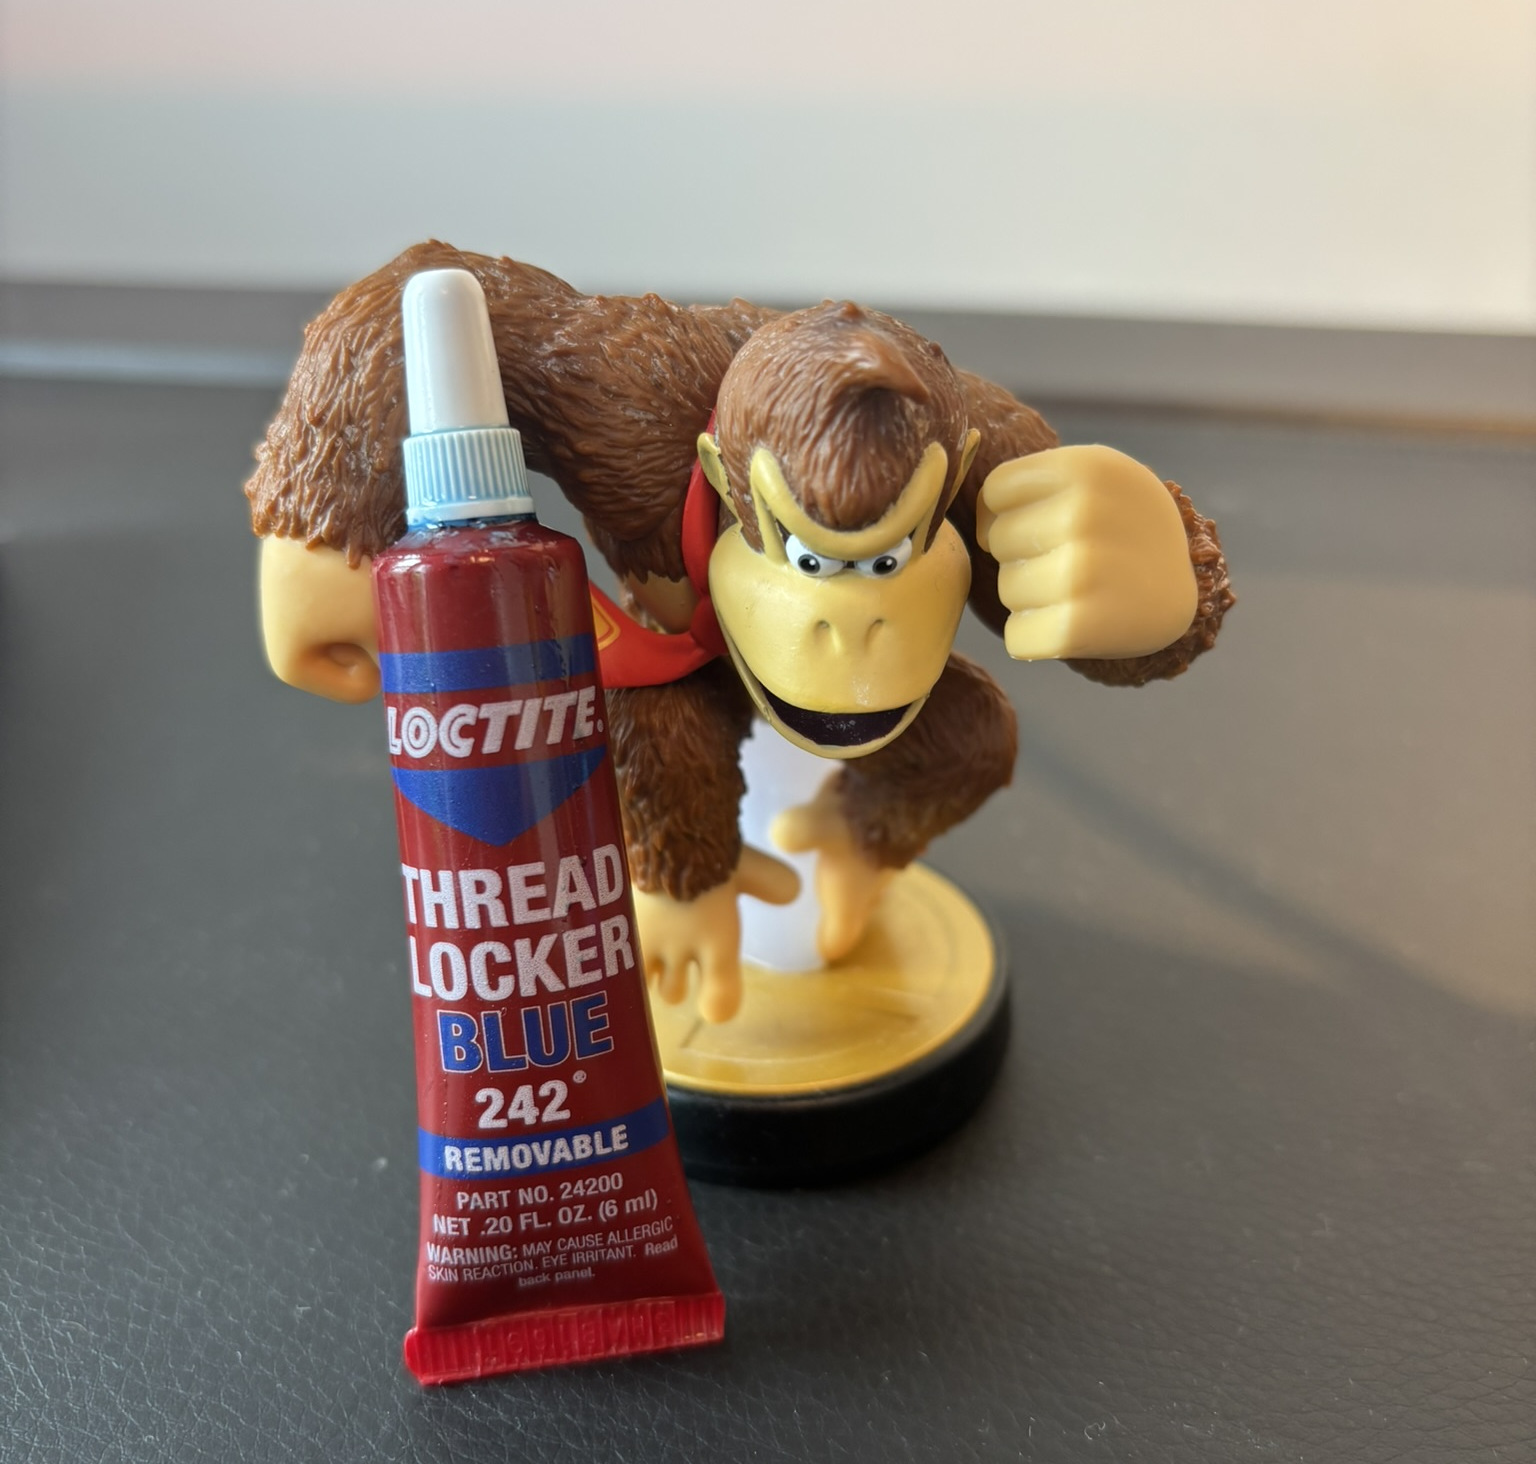
Loctite Threadlocker Blue 242
Medium-strength threadlocker that keeps bolts from loosening without making them impossible to remove.
Read the review →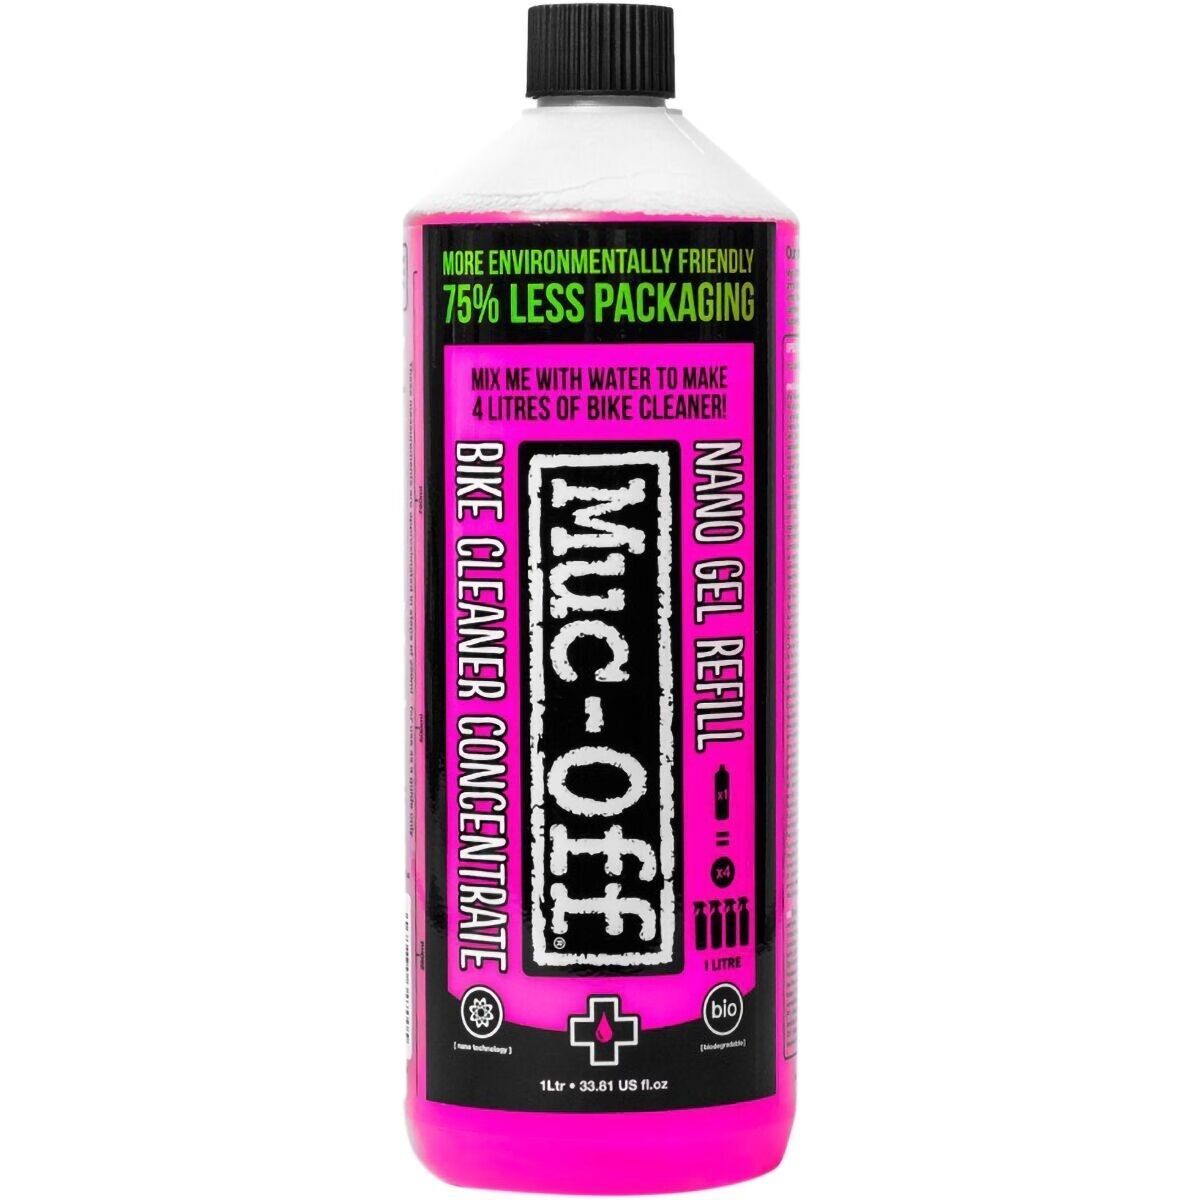
Muc-Off Concentrate
Eco-friendly bike cleaner concentrate for refilling spray bottles.
Read the review →